How to Add a Signature in Apple Mail (Step-by-Step)
Set up your Apple Mail signature in minutes. Follow the step-by-step guide, then add your logo, photo, social icons, and clickable banners.

Short answer
How to add a signature in Mac Mail?
- In your Mac Mail app, select “Mail” in the top ribbon > Click “Preferences“.
- Choose “Signatures”.
- Choose the specific email account where you want to create your signature.
- Click the “Plus” (+) button to create a new signature > Give your signature a name.
- Edit your Apple Mail signature to your heart’s delight

Professional Mac Mail signature | Made with WiseStamp
How to create an HTML Apple Mail signature?
Making a working HTML signature for your Mac Mail is not as simple as one may think.
Even if you have a good eye for design and good knowledge of code (which most of us don’t), you’ll still have to build HTML that’s responsive for all the different devices and screen sizes out there, to make sure your signature doesn’t break.
Professional Mac Mail example

Broken HTML signature example

2 Ways to create your Mac Mail HTML signature
- By creating your own code
- by letting Wisestamp make the code for you and install it for you in your email
If you want to enjoy a responsive HTML email signature without an email signature generator, you’ll have to work hard. But what can I say, hard work is its own reward.
For the easy way – try WiseStamp.
How do I add a signature in Apple Mail?
Open the Mac Mail signature editor
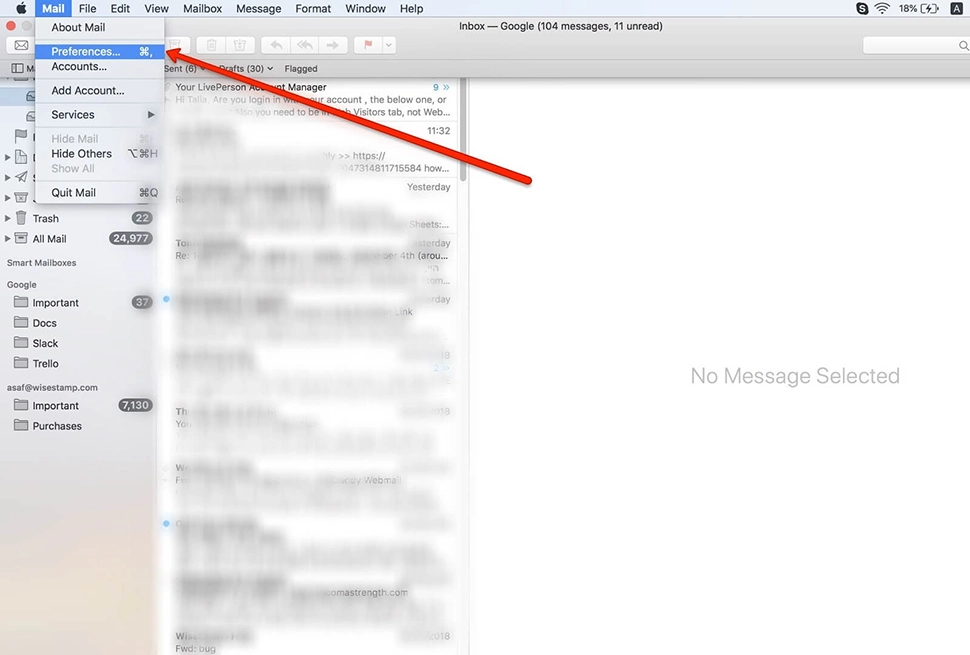
Open your Mac Mail app > Click on Mail drop down from the top ribbon > Select “Preferences”
Create a new signature
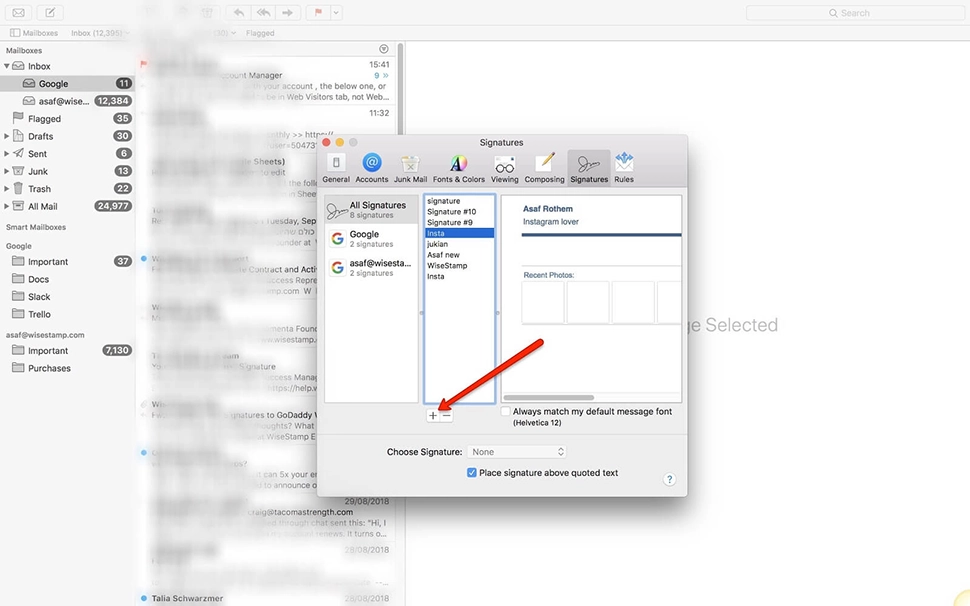
Choose the “Signatures” tab, then click the [+] plus button to add a new signature, or select a signature you’ve already created to edit it.
Add an a hyperlink
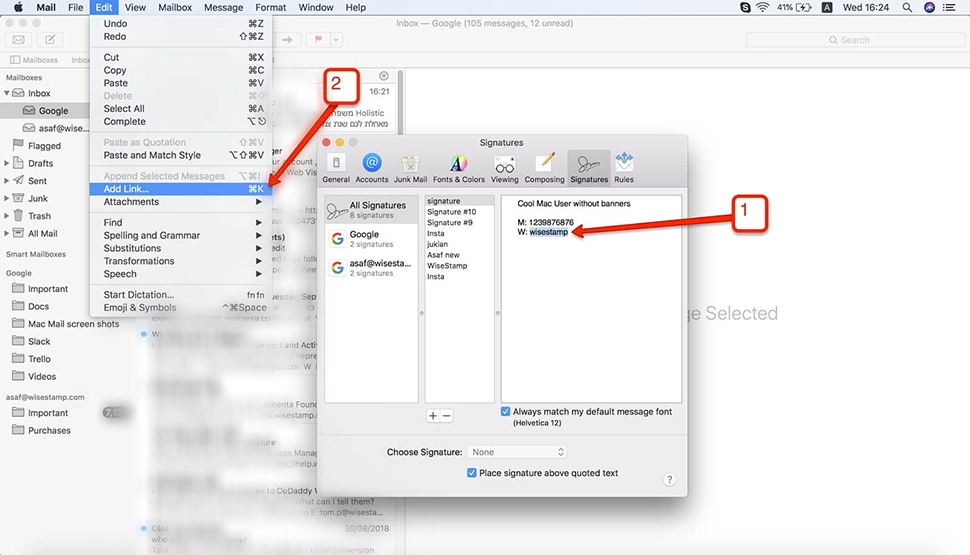
Highlight the signature text you want to hyperlink > Go to the menu ribbon and select “Edit” > then “Add Link”, or use the keyboard shortcut Command + K (⌘+K).
See in depth guide for adding images & hyperlinks to Apple Mail >.
Add hyperlink URL address
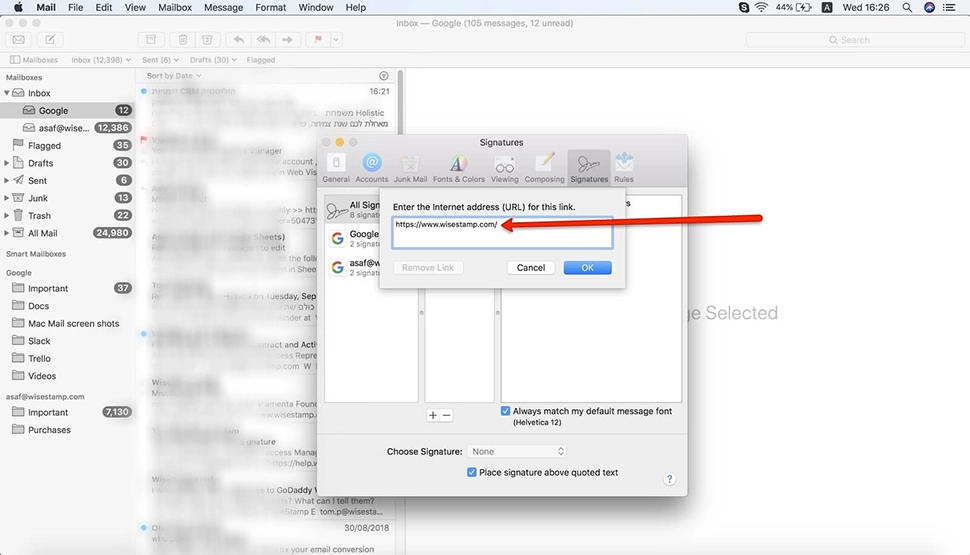
Enter the complete page address (URL) in the field provided (including http://) > click “Ok”.
Add clickable banner
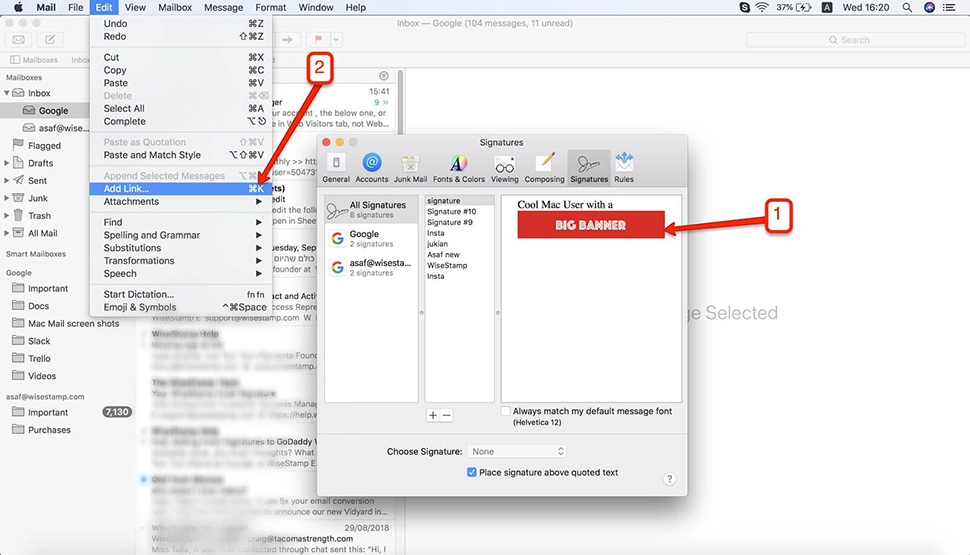
Copy your email banner from your computer or from the web and paste it into your signature. Be sure to click your cursor in the place within the signature where you want the banner to be placed.
Click the image and type Command + K (⌘+K) on your keyboard to add a hyperlink to that image and make it clickable.
Assign signature to email account
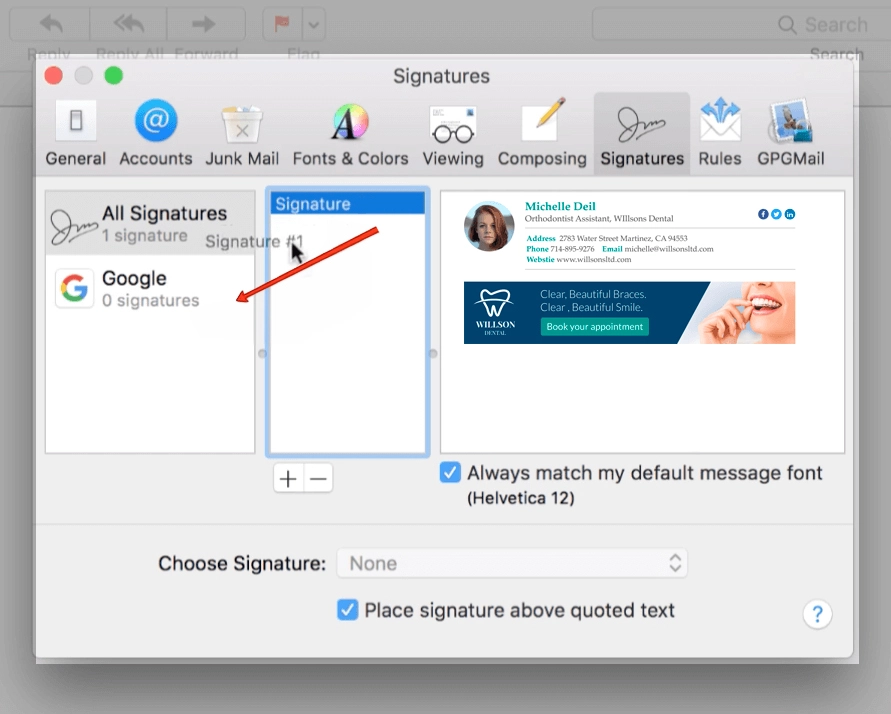
To assign your new Apple Mail signature to a specific email account (e.g. Gmail), simply drag that signature and drop it on the email account to which you’d like to assign it (in the left column).
Set signature for Reply/Forward messages
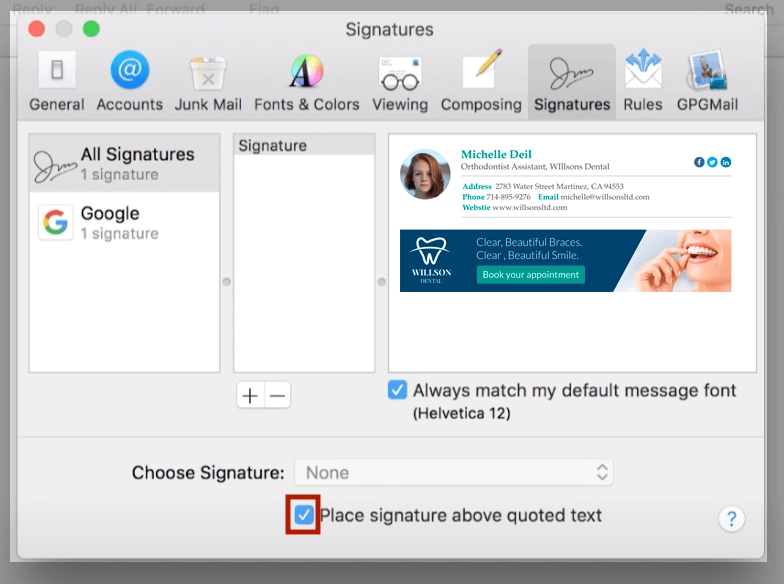
If you would like your signature to also appear for messages that are Replies or Forwards, untick the “Place signature above-quoted text” box.
Be sure to save your work when you are finished.
What does a professional Apple Mail include?
- Our name and job title
- Your business name and logo
- A high-quality photo of you
- Your brand colors
- Social media icons
- Some business offer with a call to action (button, banner, video, link)
What not to include in my Apple Mail signature?
When trying to create the perfect Mac signature there’s sometimes a tendency to go overboard with design and features. Try to resist this urge if you encounter and you’ll end up with a cleaner, better looking, more effective email signature.
Look out for these 3 common mistakes:
1) Don’t use too many colors
Adding color to your email signature is a great idea. But adding too many colors? That’s a bad idea. A signature in an email should reflect your logo’s colors. If you don’t have one, go with the rule of thumb – 2 colors maximum – one main, one secondary.
2) Don’t overload your signature with calls to action
It’s smart to add buttons like “Follow us on Facebook” that prompt your email recipients to take action. However, do not add more than 2 calls-to-action within your signature – it will overload and confuse your readers.
When you want people to take action, less is more. You want to direct your email readers to the most valuable actions (you shouldn’t have more than 1 or 2 of those). So, decide whether it’s a link to “Join our newsletter,” “Follow us on Facebook,” or “Shop our sale”, to give just a few examples.
3) Don’t use illegible fonts or too many font types
Some fonts are hard to read, such as cursive or decorated fonts. Using these will make people not wish to read your signature text and could possibly irritate most who see it. Keep to using clear fonts a 10-year-old could easily understand.
Some fonts are not compatible with most browsers and email apps. Have you ever received an email with a bunch of strange characters in gibberish?
That’s likely because the sender of the email did not use a web-safe font. A web-safe font is one that will consistently work across all devices and platforms (Apple, PC, iOS, Droid, etc).
We recommend choosing one of the following web-safe fonts:
- Courier
- Georgia
- Verdana
Another issue is using too many fonts. Don’t mix font types, even if each of them is web-safe. It’s distracting and looks less professional. 1 signature 1 font – that’s your motto.

Professional Apple Mail signature | Made with WiseStamp