How to Add a Professional Signature in Gmail (5 Easy Steps)
Learn how to set up a signature in Gmail with this simple step-by-step guide. Set an auto Gmail signature and insert special features like images and links.
How to add a signature to Gmail (Mac and PC)
Gmail does not have a desktop app for both PC and Mac operating systems. The only way to access your account is via the Gmail web version, which works similarly on both systems.
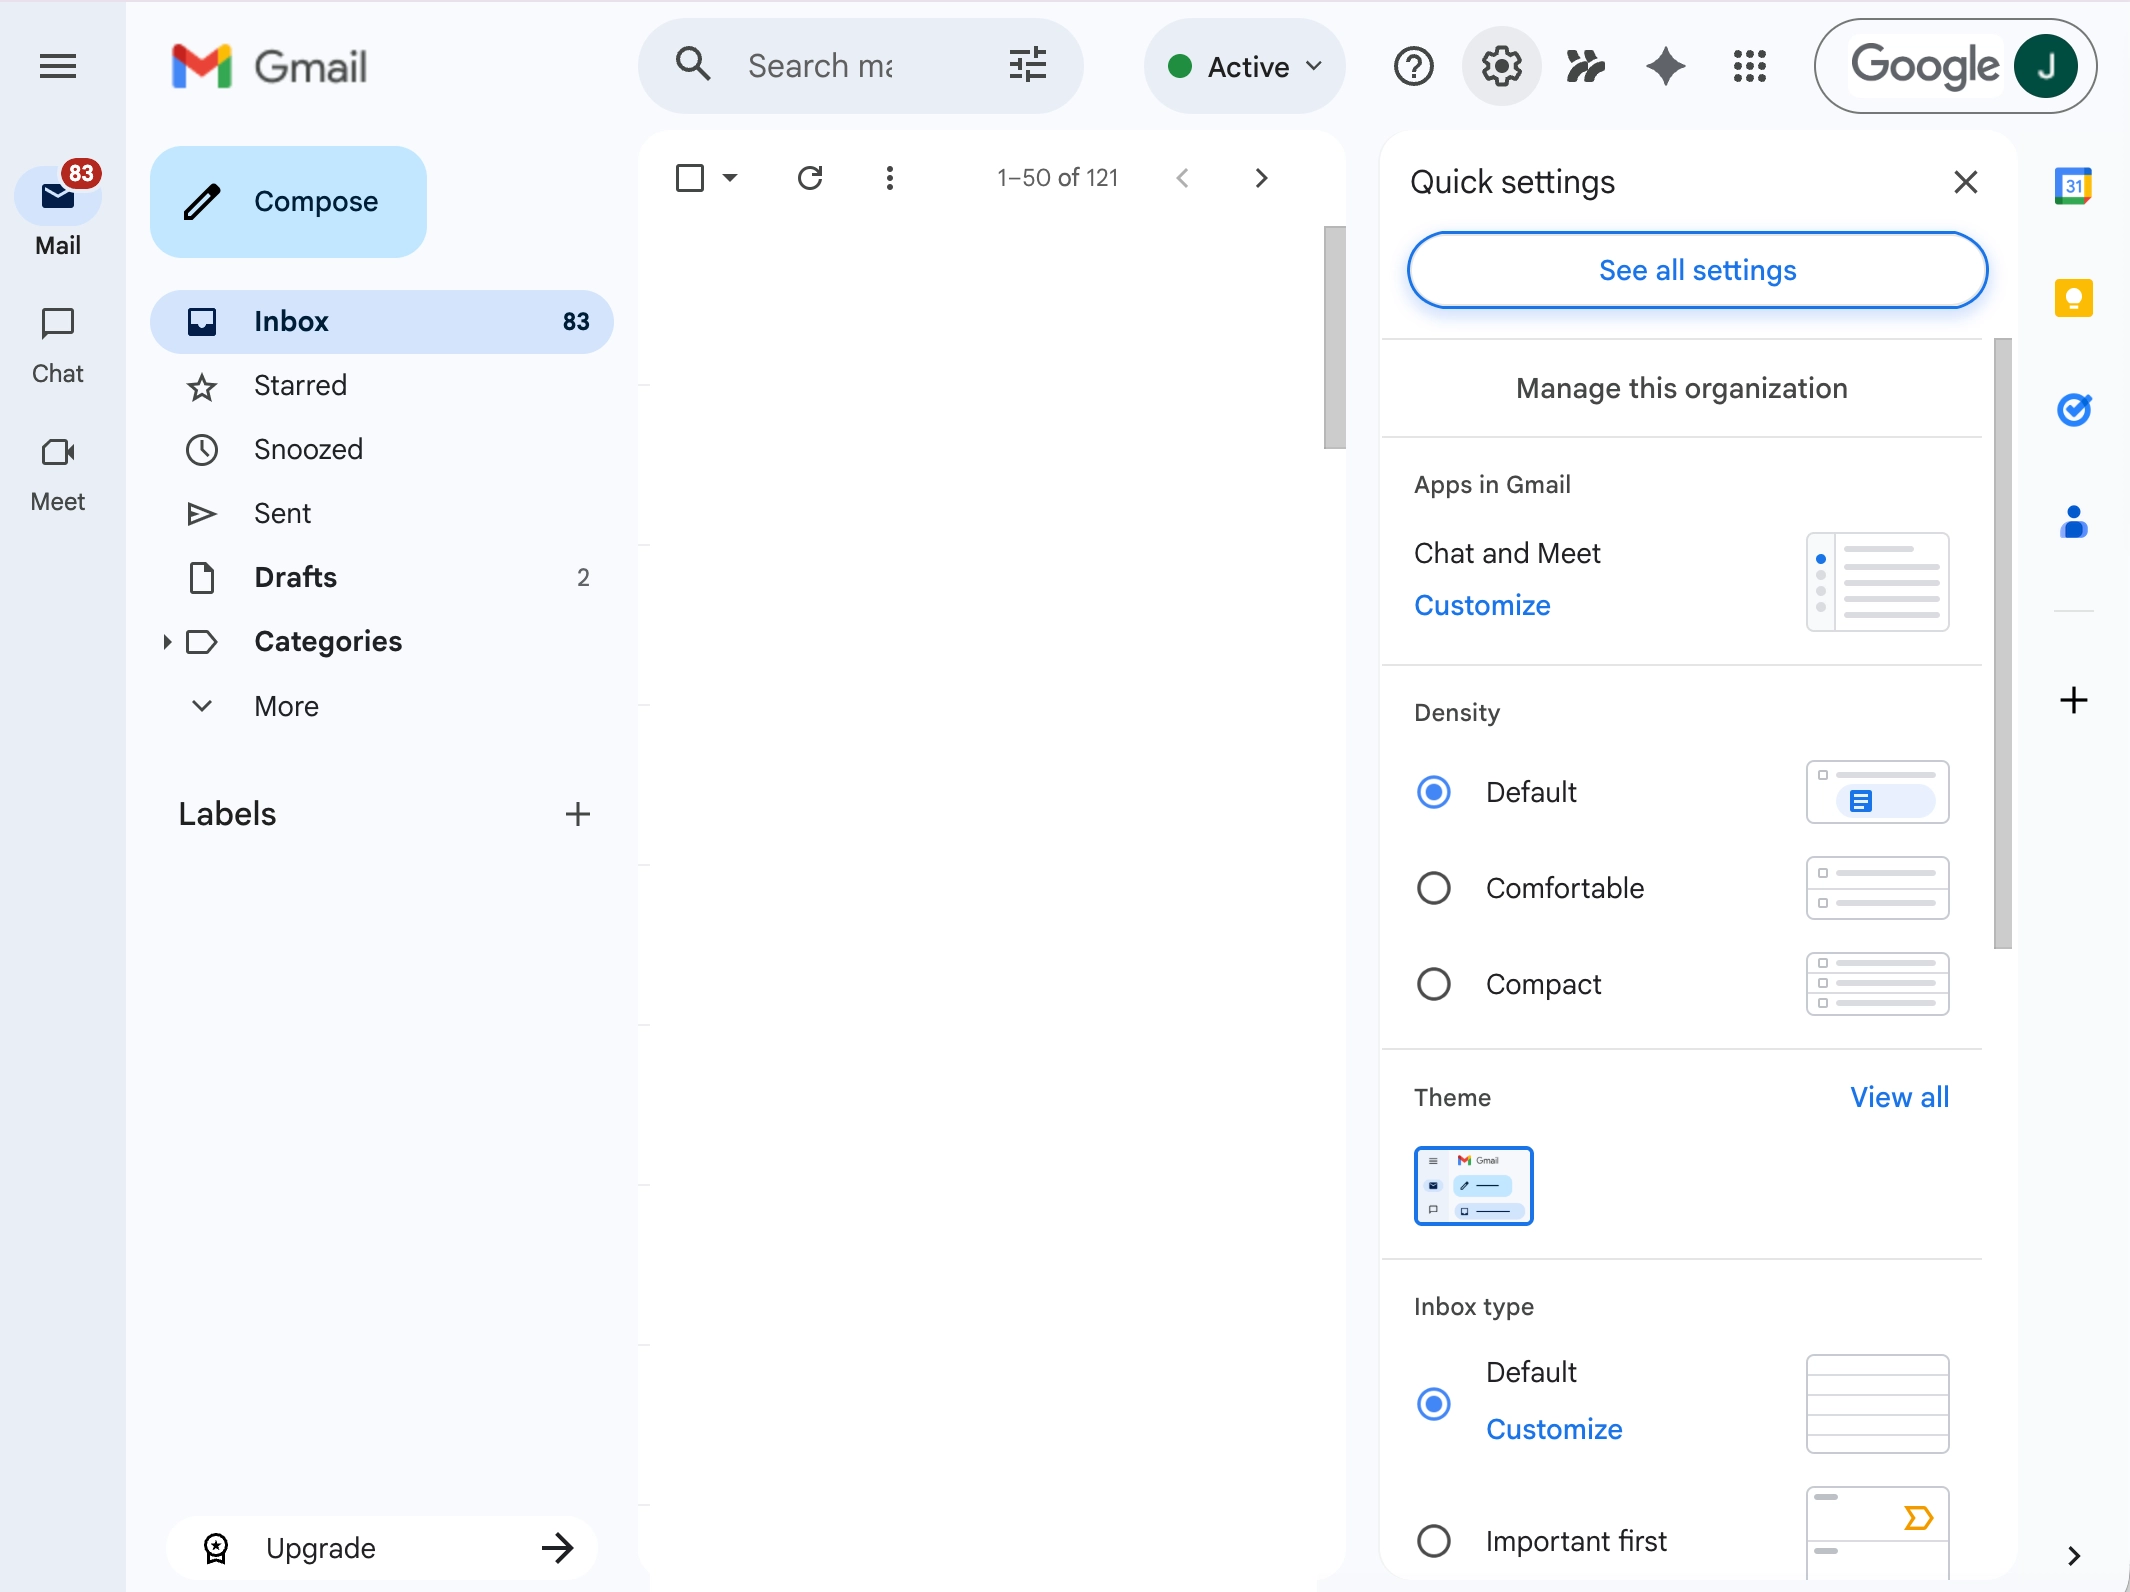
Open Gmail Settings
In the top right corner of your screen, click on the gear icon and then click “See all settings” in the Quick settings panel.
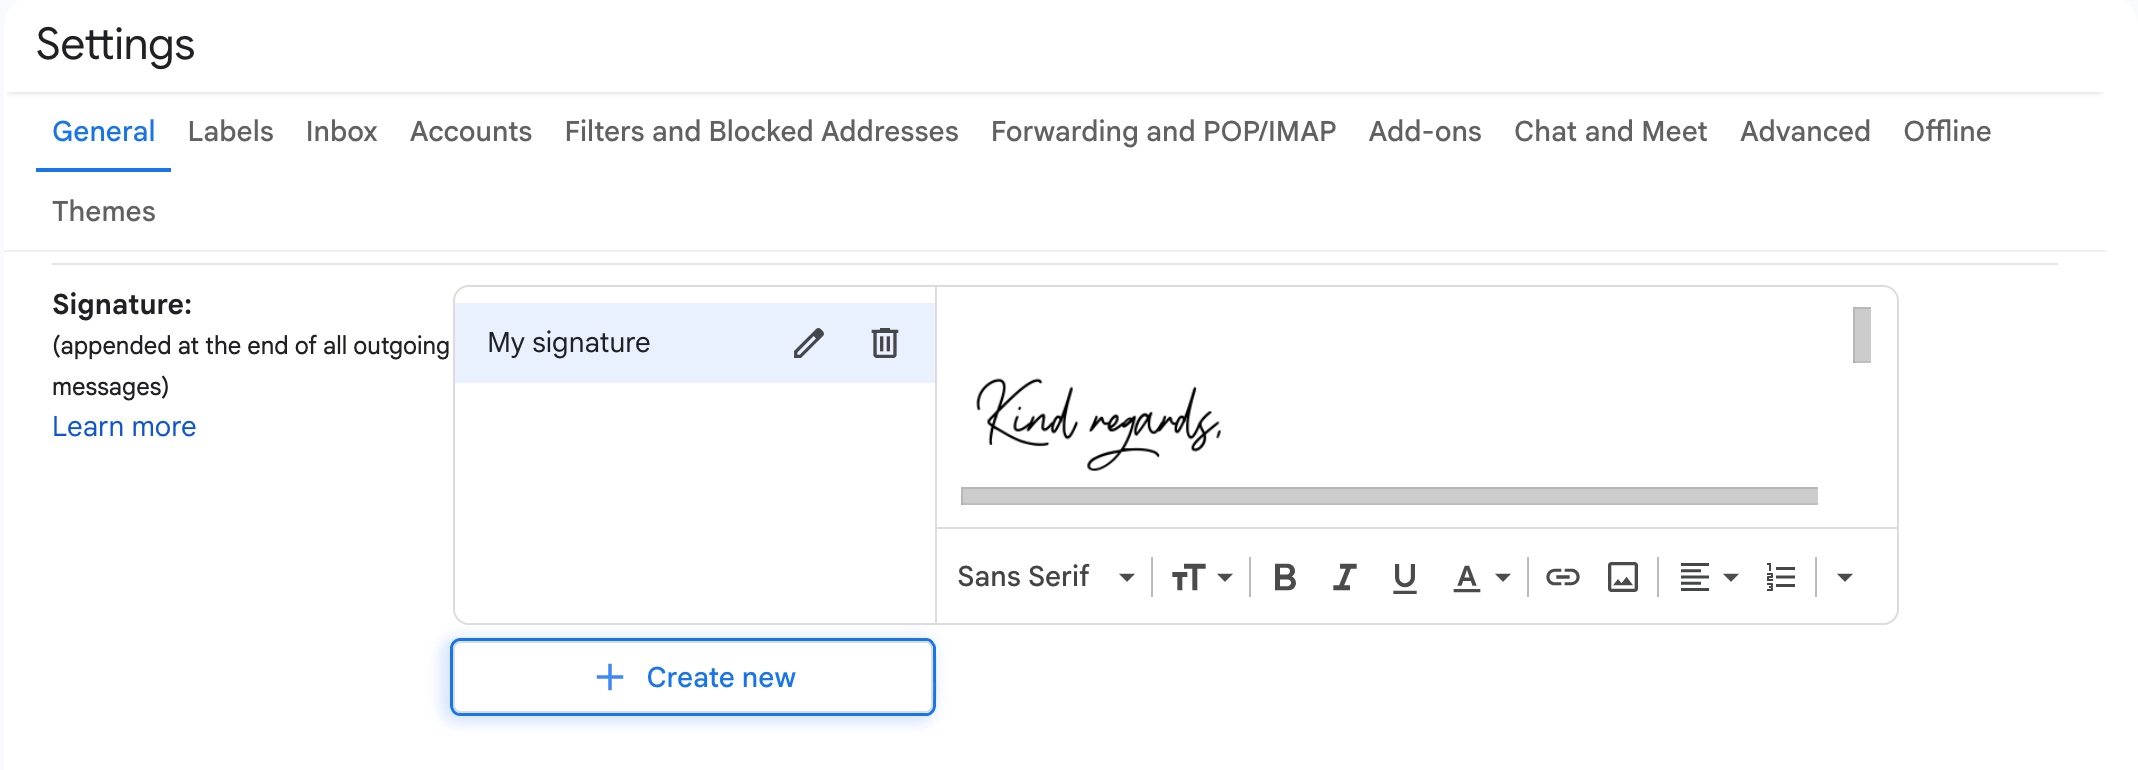
Navigate to the signature section
In the settings panel, scroll down to get to the Signature tab. Click on the “Create New” button to add a Gmail signature.
Add your signature details
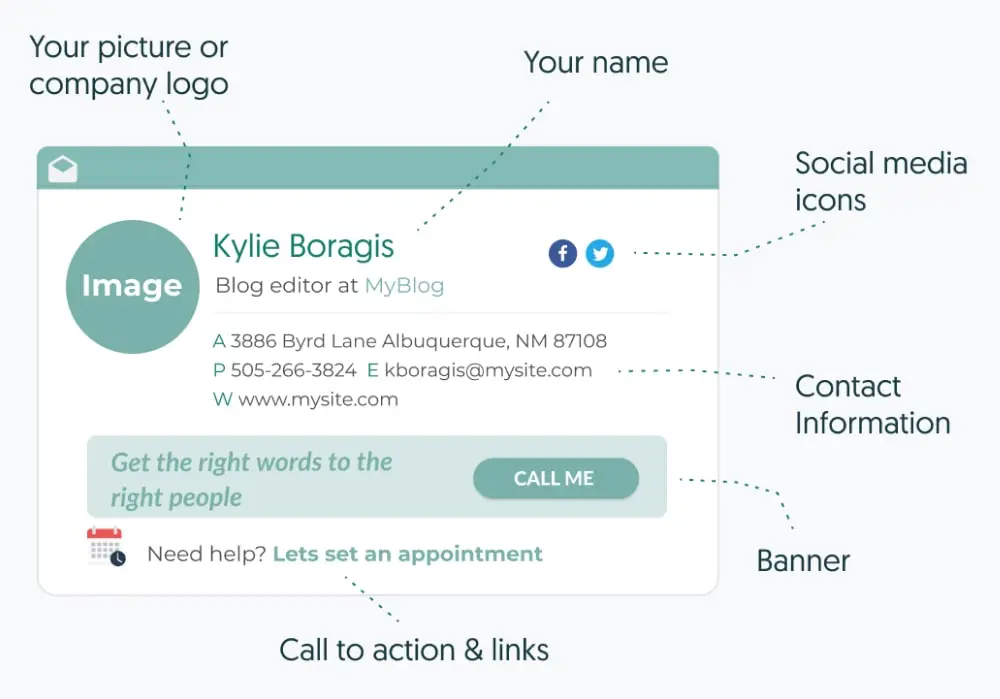
Create your signature in the text box to the right of your signature name. Ensure you include your full name, job title, company name, and contact information.

Edit your Gmail signature
The next step is using the rich text editor to make your signature look neat and professional.
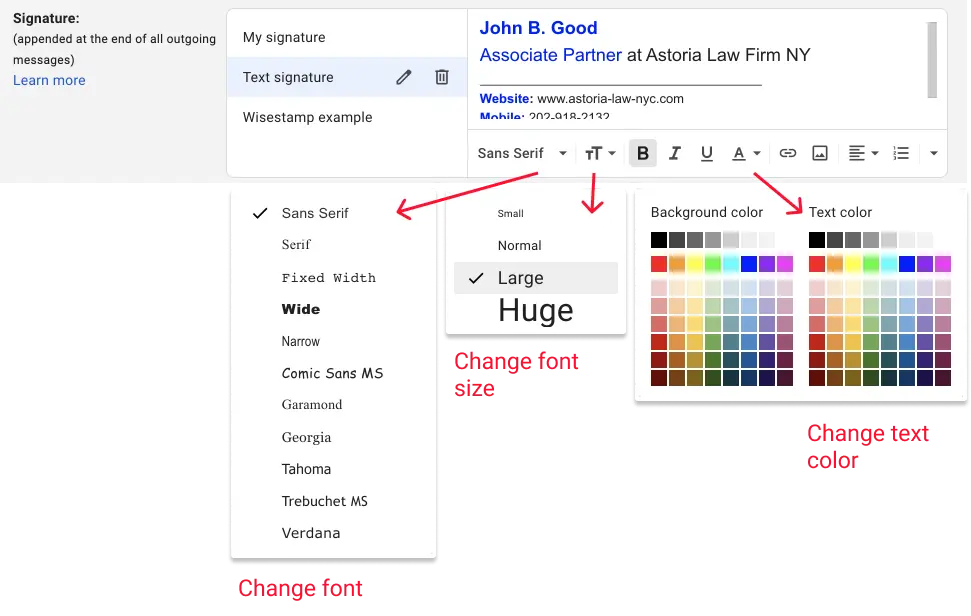
Here’s how to edit signatures in Gmail:
Change font size:
- Select the signature text you would like to edit
- Click on the tT icon at the left of the toolbar > choose the text size you’d like to use (Small, Normal, Large, or Huge)
Change text color:
- Click on the A icon at the right of the signature editor’s toolbar
- Pick the text color you’d like to use from the right-side color pallet
Change signature font:
- Click where it says “Sans serif” on the left side of the editor’s toolbar
- Choose the font you’d like to use for your signature (these are all email-safe fonts)
Set auto Gmail signatures and save
Just below the signature editor, you’ll see additional settings that let you tell Gmail which signature to set as your auto signature for New and Reply/Forward messages. Lastly, scroll down to the bottom page and click “Save changes.”
How to create a signature in Gmail mobile app (Android)
The email signature you create on Gmail’s web version is not applied to the emails you send from your phone. The only exception is if you are using a platform like WiseStamp, which applies your signatures to all your devices automatically.
If you mostly compose emails using your phone, adding a Gmail digital signature becomes necessary.
Setting up signatures in Gmail mobile app (Android)
Launch the Gmail app on your Android phone
Navigate to Gmail signature settings
Click the three-line icon at the top-left corner of your phone’s screen. Scroll down and tap “Settings.”
Select your email address
If you have multiple email addresses attached to your phone, you’ll be prompted to choose the account you wish to make changes to from a list.
Navigate to mobile signature and design your signature
Scroll down to the Mobile signature section. Tap on it and type your signature. Note that the Gmail app version only supports plain text signatures. Click “OK” when you’re done to save your signature.
How to add a signature in the Gmail iPhone app (iOS)
Gmail signature settings look a little different on Android and iPhone, and the setup steps vary slightly, too. Here’s how to set up a Gmail signature on iPhone:
Navigate to signature settings on the Gmail app
Open the Gmail app on your iPhone and click on the hamburger icon at the top-left corner of the screen. Scroll down and tap on signature settings.
Type your signature
In the window that opens, enable mobile signature. Type your signature in the text box that comes up. Tap Done at the top-right corner of the screen to save your signature.
Test your signature
That’s how to insert a signature in Gmail on an iPhone. Try composing a new email. Your new signature should appear in the body of your email.
Technical issues when adding signatures in Gmail
There are several technical issues to be aware of when learning how to add an email signature in Gmail:
- Signature not appearing on new emails
- Images missing in the signature
- Extra characters in the signature
Signature not appearing on new emails
In most cases, this happens when you have selected “No signature” as your default signature. Navigate to Gmail signature settings > signature defaults and double-check that you have selected the correct signature as your default. Remember to click “Save changes” at the bottom of the page.
Images missing in the signature
A common reason for images not appearing in email signatures is that they are hosted on a private server. To fix this issue, use a working image URL or upload an image from your device.
Keep in mind that your images may not appear if they are too large. Keep image file sizes under 1MB to minimize load times.
Extra characters in the signature
Extra characters in email signatures often occur when some Gmail versions don’t support a given formatting option, like bold or italics. To solve this problem, navigate to your Gmail signature section and highlight your signature. Click “Remove formatting.”
Want to avoid these issues entirely?
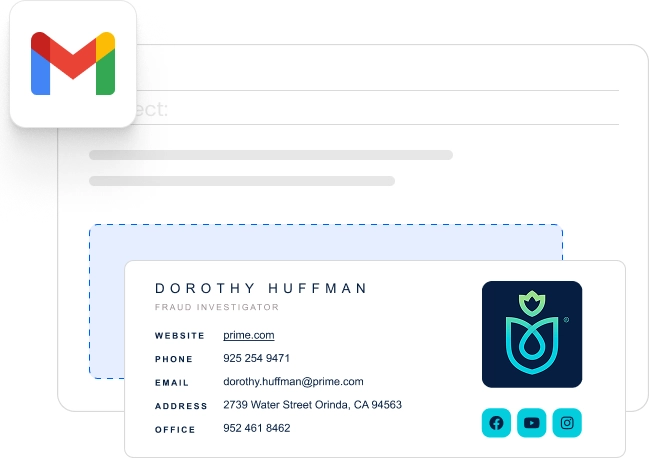
Using an email signature manager like WiseStamp is the simplest way to create a professional signature that works seamlessly across all devices. Our signature generator offers both free and pro options, removing the need for manual adjustments and ensuring your signature always displays correctly.
No technical skills required—just upload your headshot or company logo, add your own details as a solo user, or your team’s information as a Teams user, and we’ll handle the rest.
Easily create a rich HTML signature with our Gmail Signature Generator
There is a world of design details and features you can use to create signatures in Gmail. From social media icons to cool animated GIFs. But these special features require a special tool.
If you don’t have any coding experience, we suggest you play around with our free Gmail signature generator. It’s a user-friendly tool with customizable templates that let you add email signatures to Gmail with just a few clicks.
Top 10 features you can add to your Gmail signature
Now that you know how to create a signature in Gmail, let’s explore 10 features you should add to optimize your signature for maximum impact:
- Youtube video thumbnail
- Quote of the day
- Custom button
- Banner
- Instagram Gallery
- Scheduler
- Email disclaimer
- Green footer
- Sales event link
- Hand signature sign off
Final thoughts
Adding a professional email signature is an effective way of enhancing your communication. When designing one, take a moment and evaluate it:
- “Does my signature include the right information without being cluttered?”
- “Is it formatted clearly and easy to read on all devices?”
- “Does it align with my professional image or company branding?”
If not, try tweaking the layout, updating your contact details, or adding a call to action. A well-structured email signature is a simple way to make every interaction count.