How to Add an Email Signature in Outlook
Learn how to add a signature in Outlook in 3 minutes or less. Dedicated guides for Outlook 365, Outlook on Mac, mobile app, and OWA

Video guide: How to add a signature in Outlook
Add a signature in outlook.com
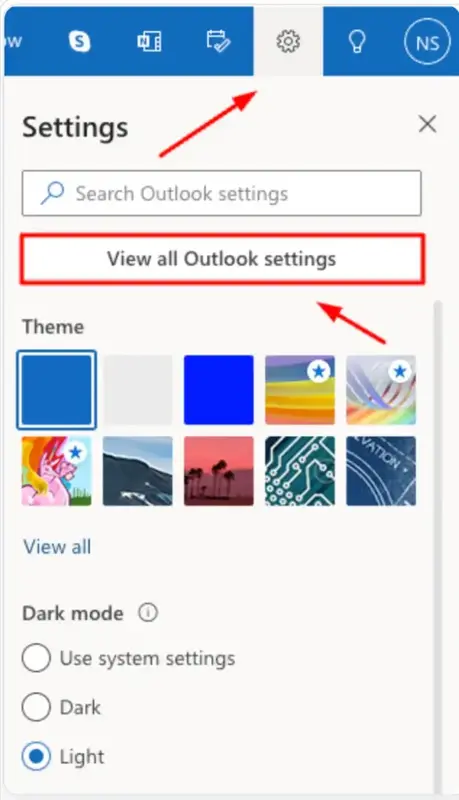
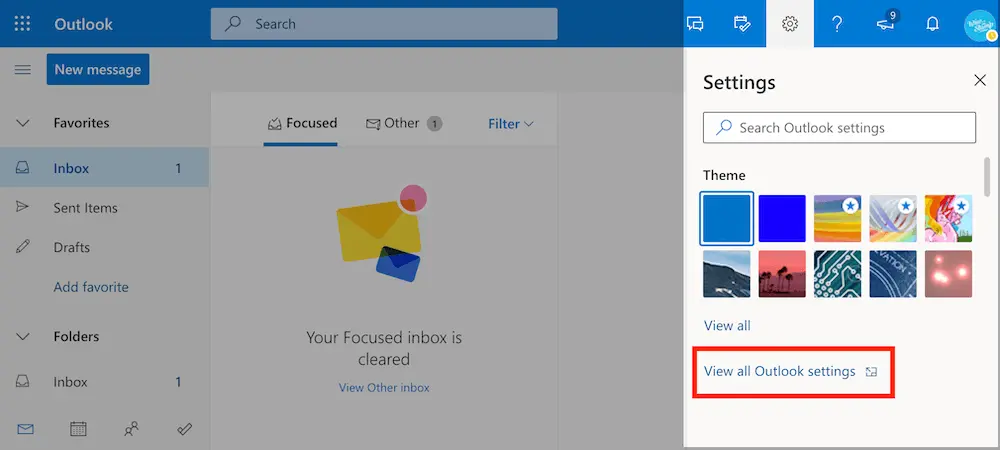
Click on the 'Settings' gear icon
Sign in to your Microsoft Outlook account and click on the “Settings” gear icon in the top right corner of the page.
In the new Settings window Click on "Account" and then "Signatures"
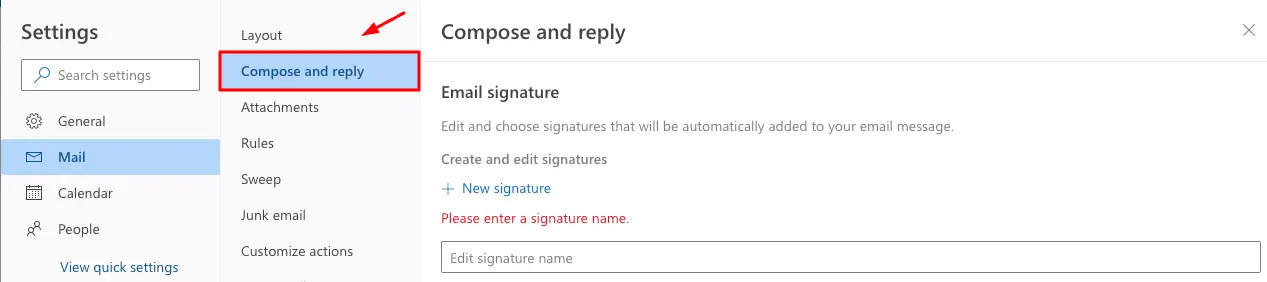
Name and create your Outlook signature
Navigate to the section labeled "+ New Signature." Below that, you'll find a small text box where you should enter a signature name. Below the signature name box is a larger text box where you create the actual signature. Use the options at the bottom of the box to insert images, change font size and color, and more.

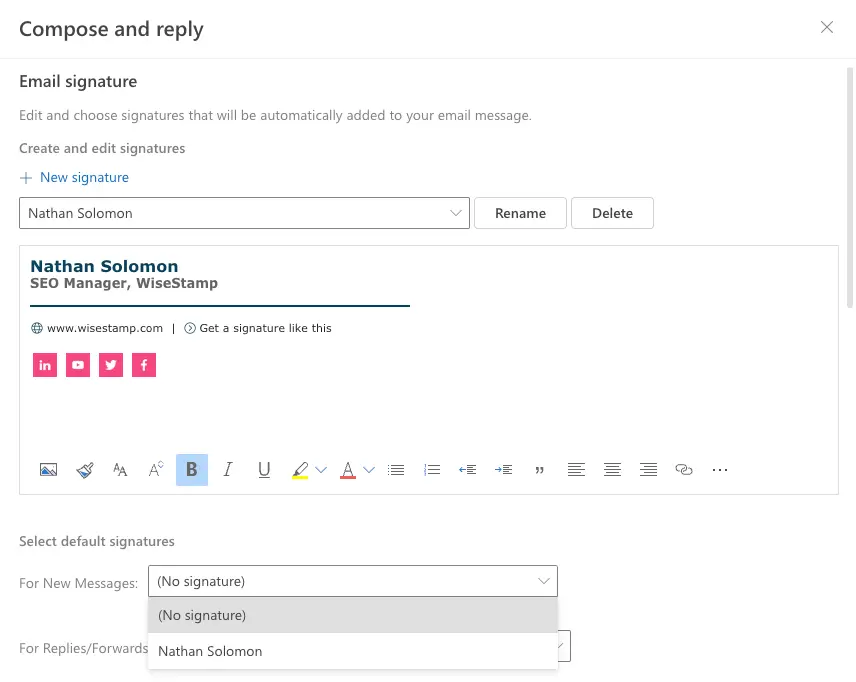
Select default signatures and save
Outlook sends emails without signatures by default. That's why you must select which signature to accompany your emails. Navigate to the bottom of the page and click the drop-down arrow icon to select the signature you want for new messages or replies/forwards. You can also select "No Signature" if you don't want to include it in a message.
That’s how to add a signature in Outlook.com. Don’t forget to click “Save” at the bottom of the page when you’re done. Close the settings window, and your new signature should appear at the bottom of every message you send.
Add a signature in Outlook for Windows
Microsoft Outlook for Windows is an app version of Outlook.com. Use the same process to add or change Outlook signatures on the two platforms.
This guide showcases how to create a signature in Outlook for version 2025.
Open the Outlook app and sign in to your Microsoft 365 account
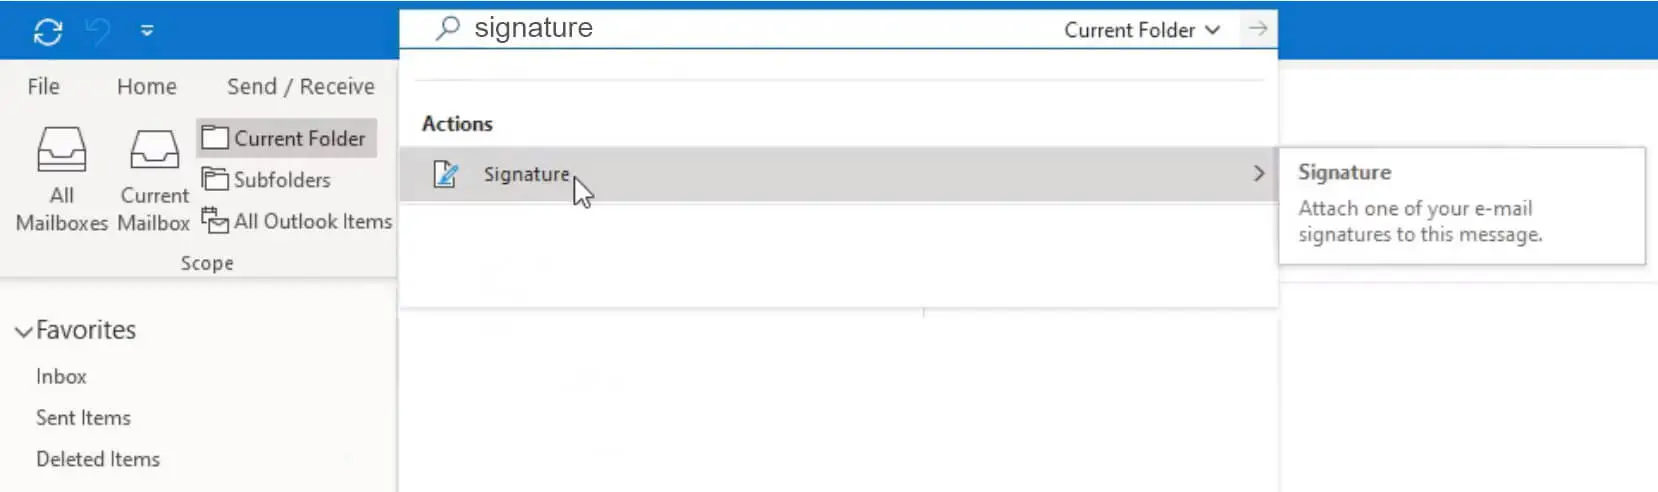
Click on the settings icon at the top-left side of your Outlook screen
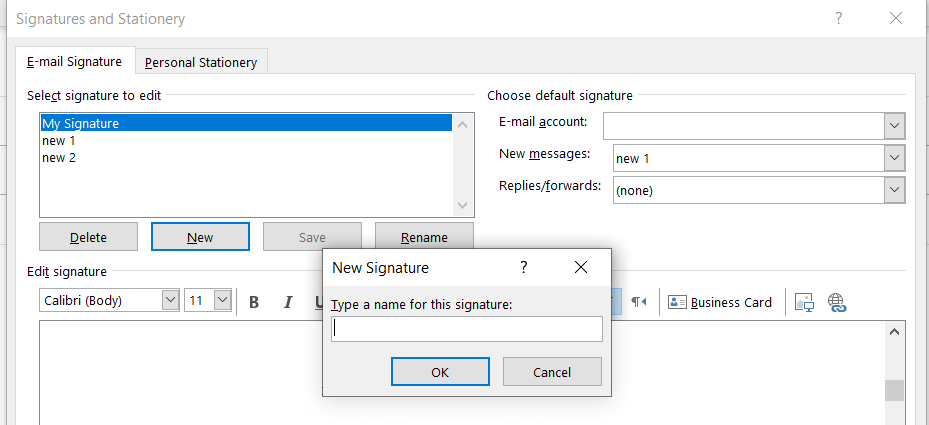
- Click on the “New” button to create a new signature for your email
- Give your new signature a name (use a name that describes this specific signature well, in case you create multiple signatures in the future)
NOTE: If you already know you’ll need multiple Outlook signatures, go see our guide on how to create multiple Outlook signatures and how to manage them.
In this new window, click on “Signatures”
Follow the prompts to add a signature to Outlook for Windows. Under “New Signature,” type the name of your new signature. Be sure to use a name that describes this specific signature well, in case you create multiple signatures in the future. Next, click in the signature editor’s text field and create your new signature.
To begin with, we’ll create the simplest form of an Outlook email signature – a simple text signature. This may be enough for you. But, in case you want something more professional, later on, I’ll show you ways to create a much richer and more effective email signature.
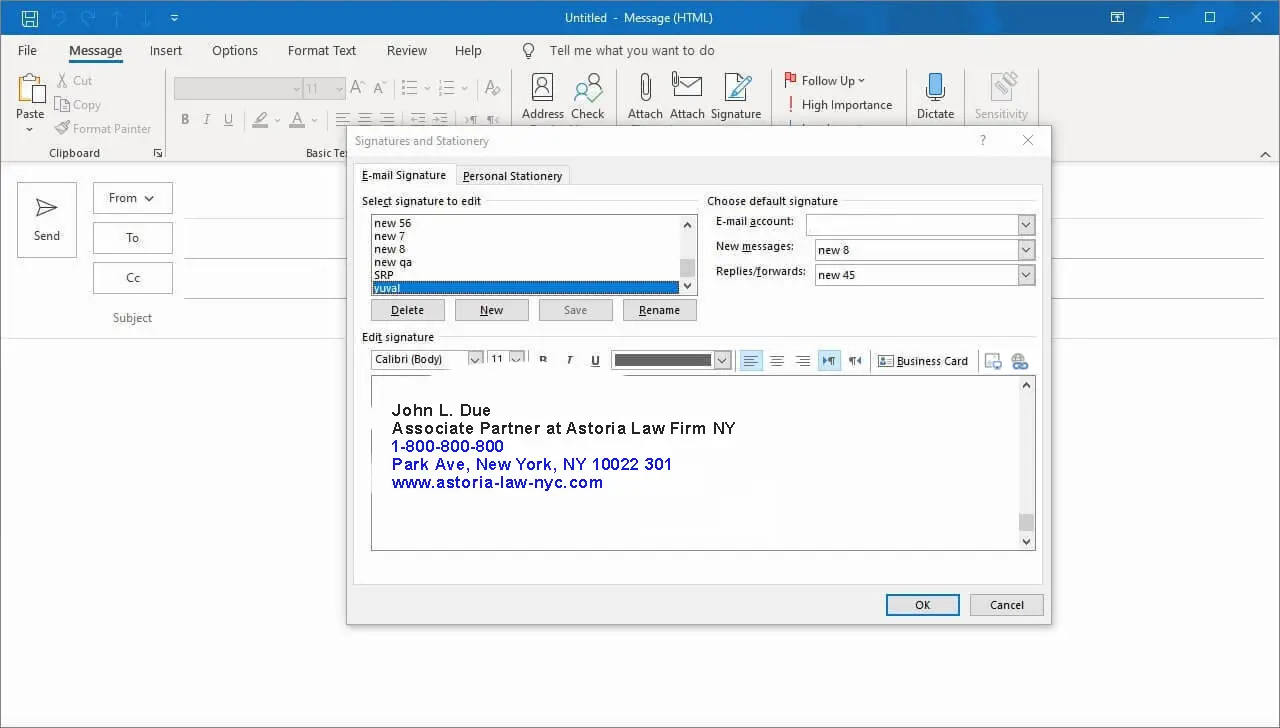
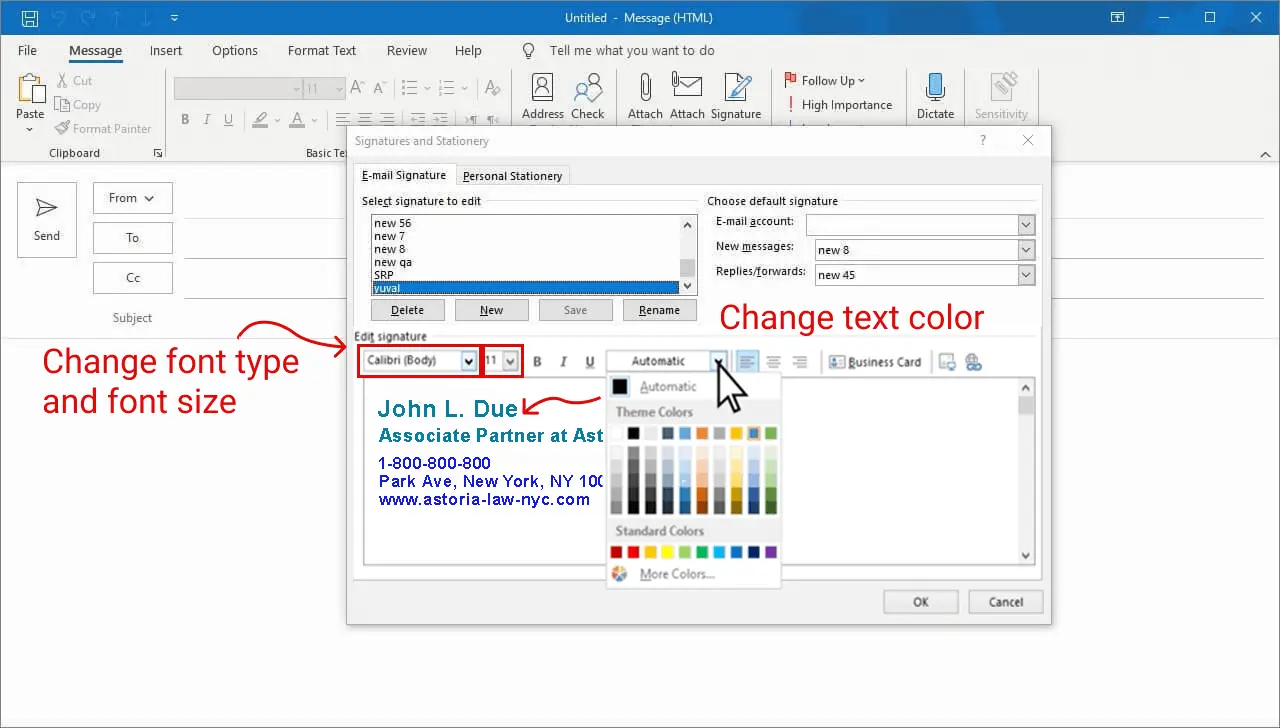
- To create your text signature click in the signature editor’s text field, and type in your full name, your job title, and your contact information.
- If you’re satisfied with this signature layout you can stop here. Simply click OK, and you’re good to go. For more advanced signature features, keep reading.
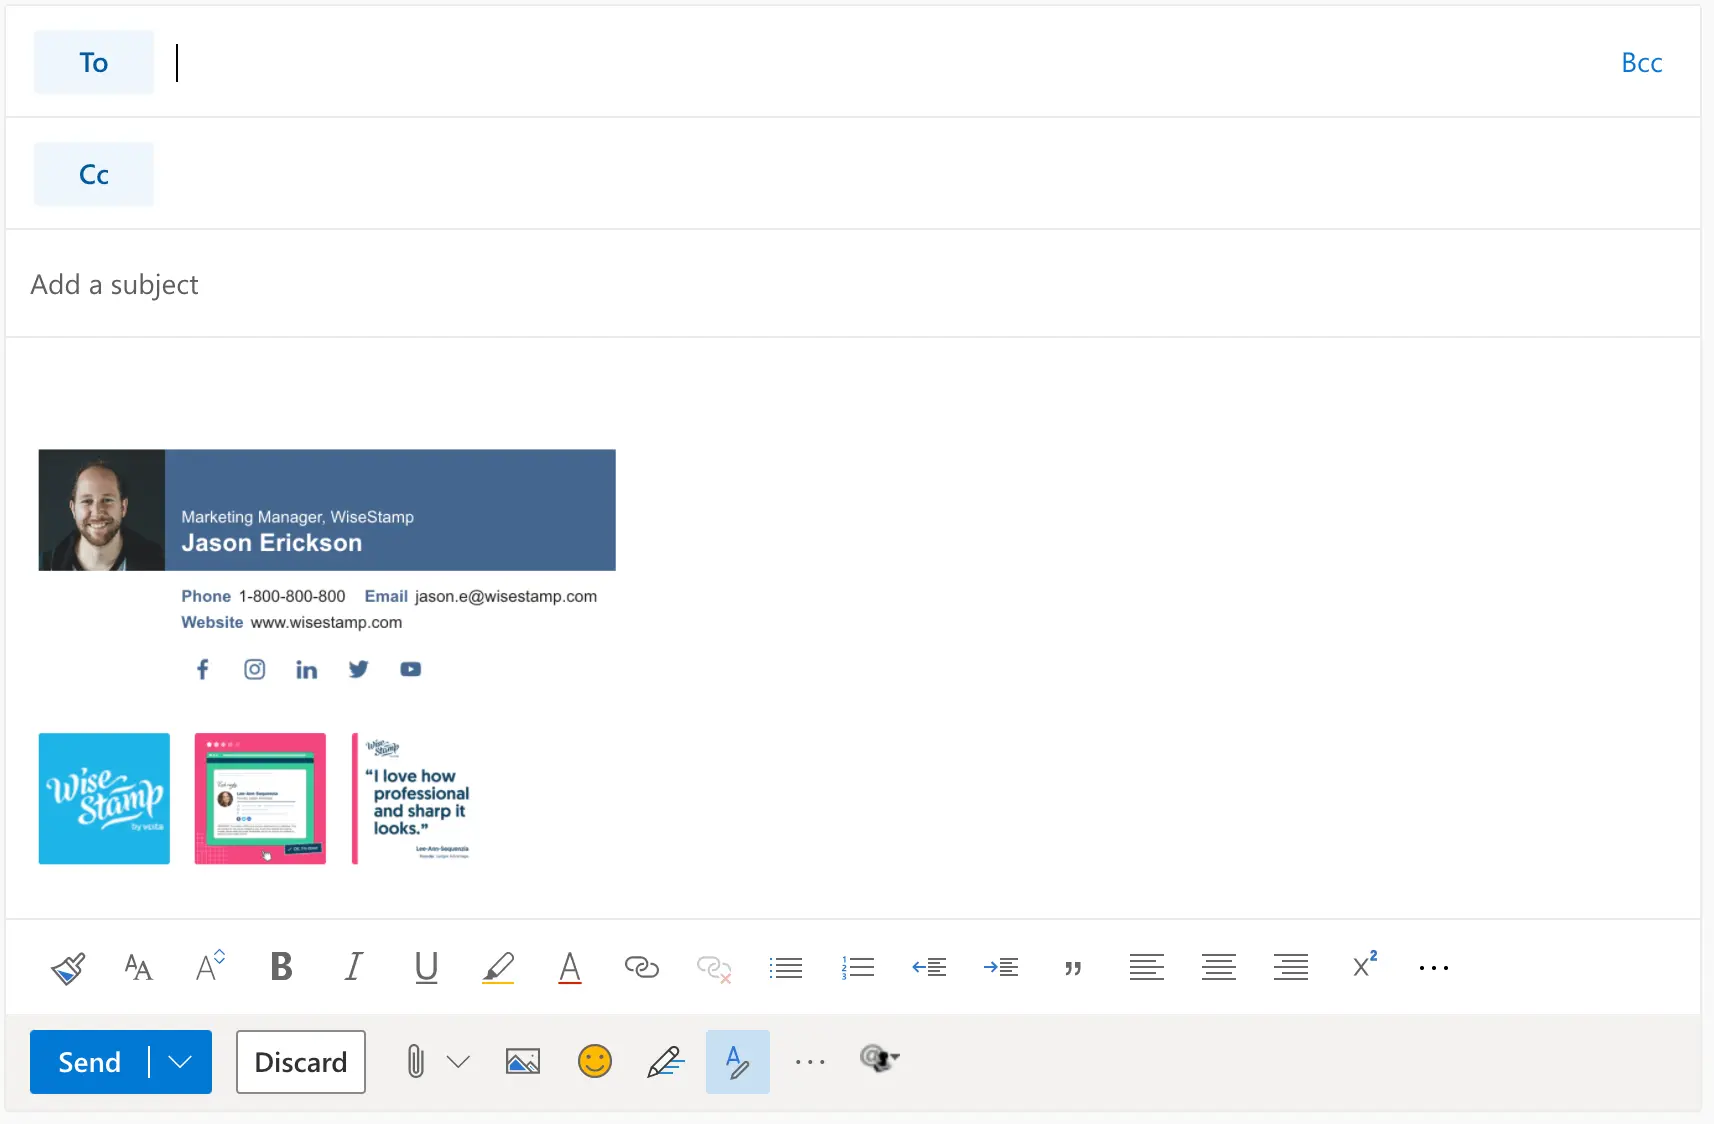
A good Outlook signature would include the following:
John L. Due
Associate Partner at Astoria Law Firm NY
1-800-800-800
301 Park Ave, New York, NY 10022
www.astoria-law-nyc.com
Select default signatures and save
Once you are done adding or changing your signature in the Outlook for Windows app, scroll down to select default signatures for new messages and replies/forwards.
Lastly, click “Save” at the bottom to apply changes.
NOTE: If you already know you’ll need multiple Outlook signatures, see our guide on how to create multiple Outlook signatures and how to manage them.
Add a signature on Outlook for Mac
Here’s a guide on how to add a signature to Outlook on Mac in less than five minutes:
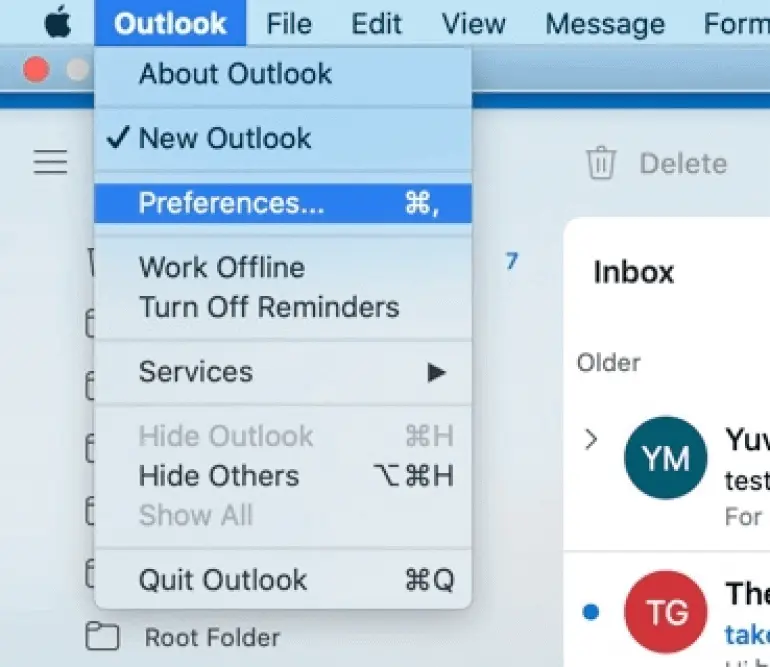
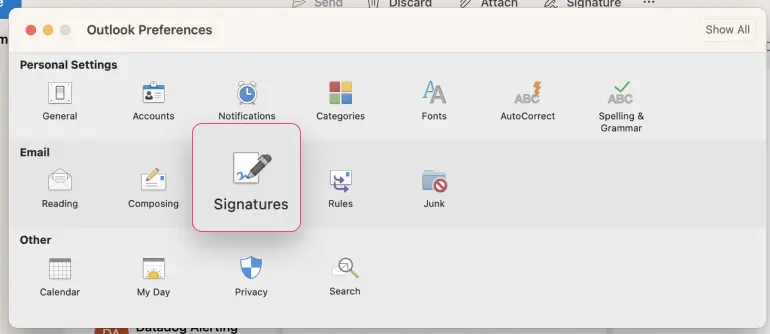
Open Outlook for Mac and go to Settings
Click on "Signatures"
In the Outlook settings window that pops up, click on “Signatures”
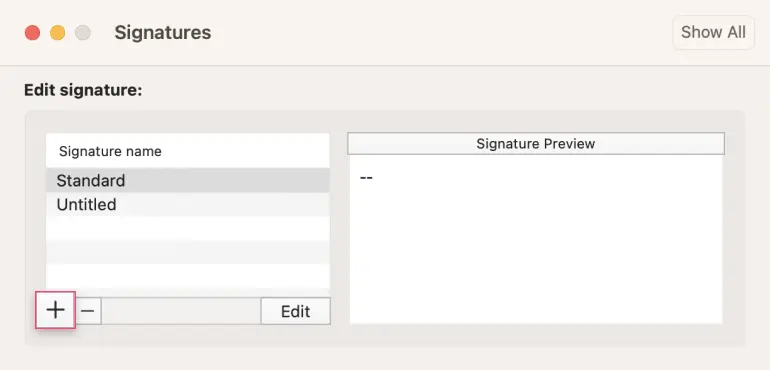
Design your signature manually or paste a pre-designed one
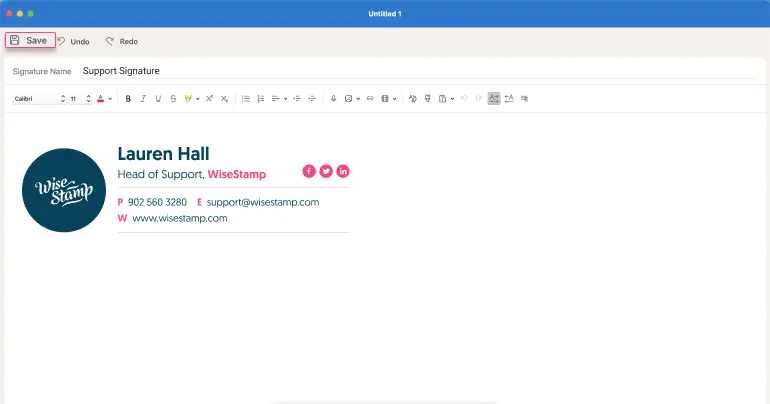
Click the "+" sign on the new window to create a new signature. Start by giving your signature a name, then use the toolbar to design a visually appealing email signature. You can also create a professional signature on WiseStamp and copy-paste it into the text box.
Set the signature as the default
Finally, go to the signatures tab and select the signature you want to set as the default.
That’s how to put a signature on Outlook for Mac. Go ahead and compose a new email. Your email signature for Mac will appear at the bottom of the message.
Add a signature in Outlook 365 Web App
Adding an email signature in the Outlook 365 web app and Outlook.com is very similar:
Click "Account" and then "Signatures" to open the Outlook 365 signature editor
Click the gear icon in the top right corner of your account
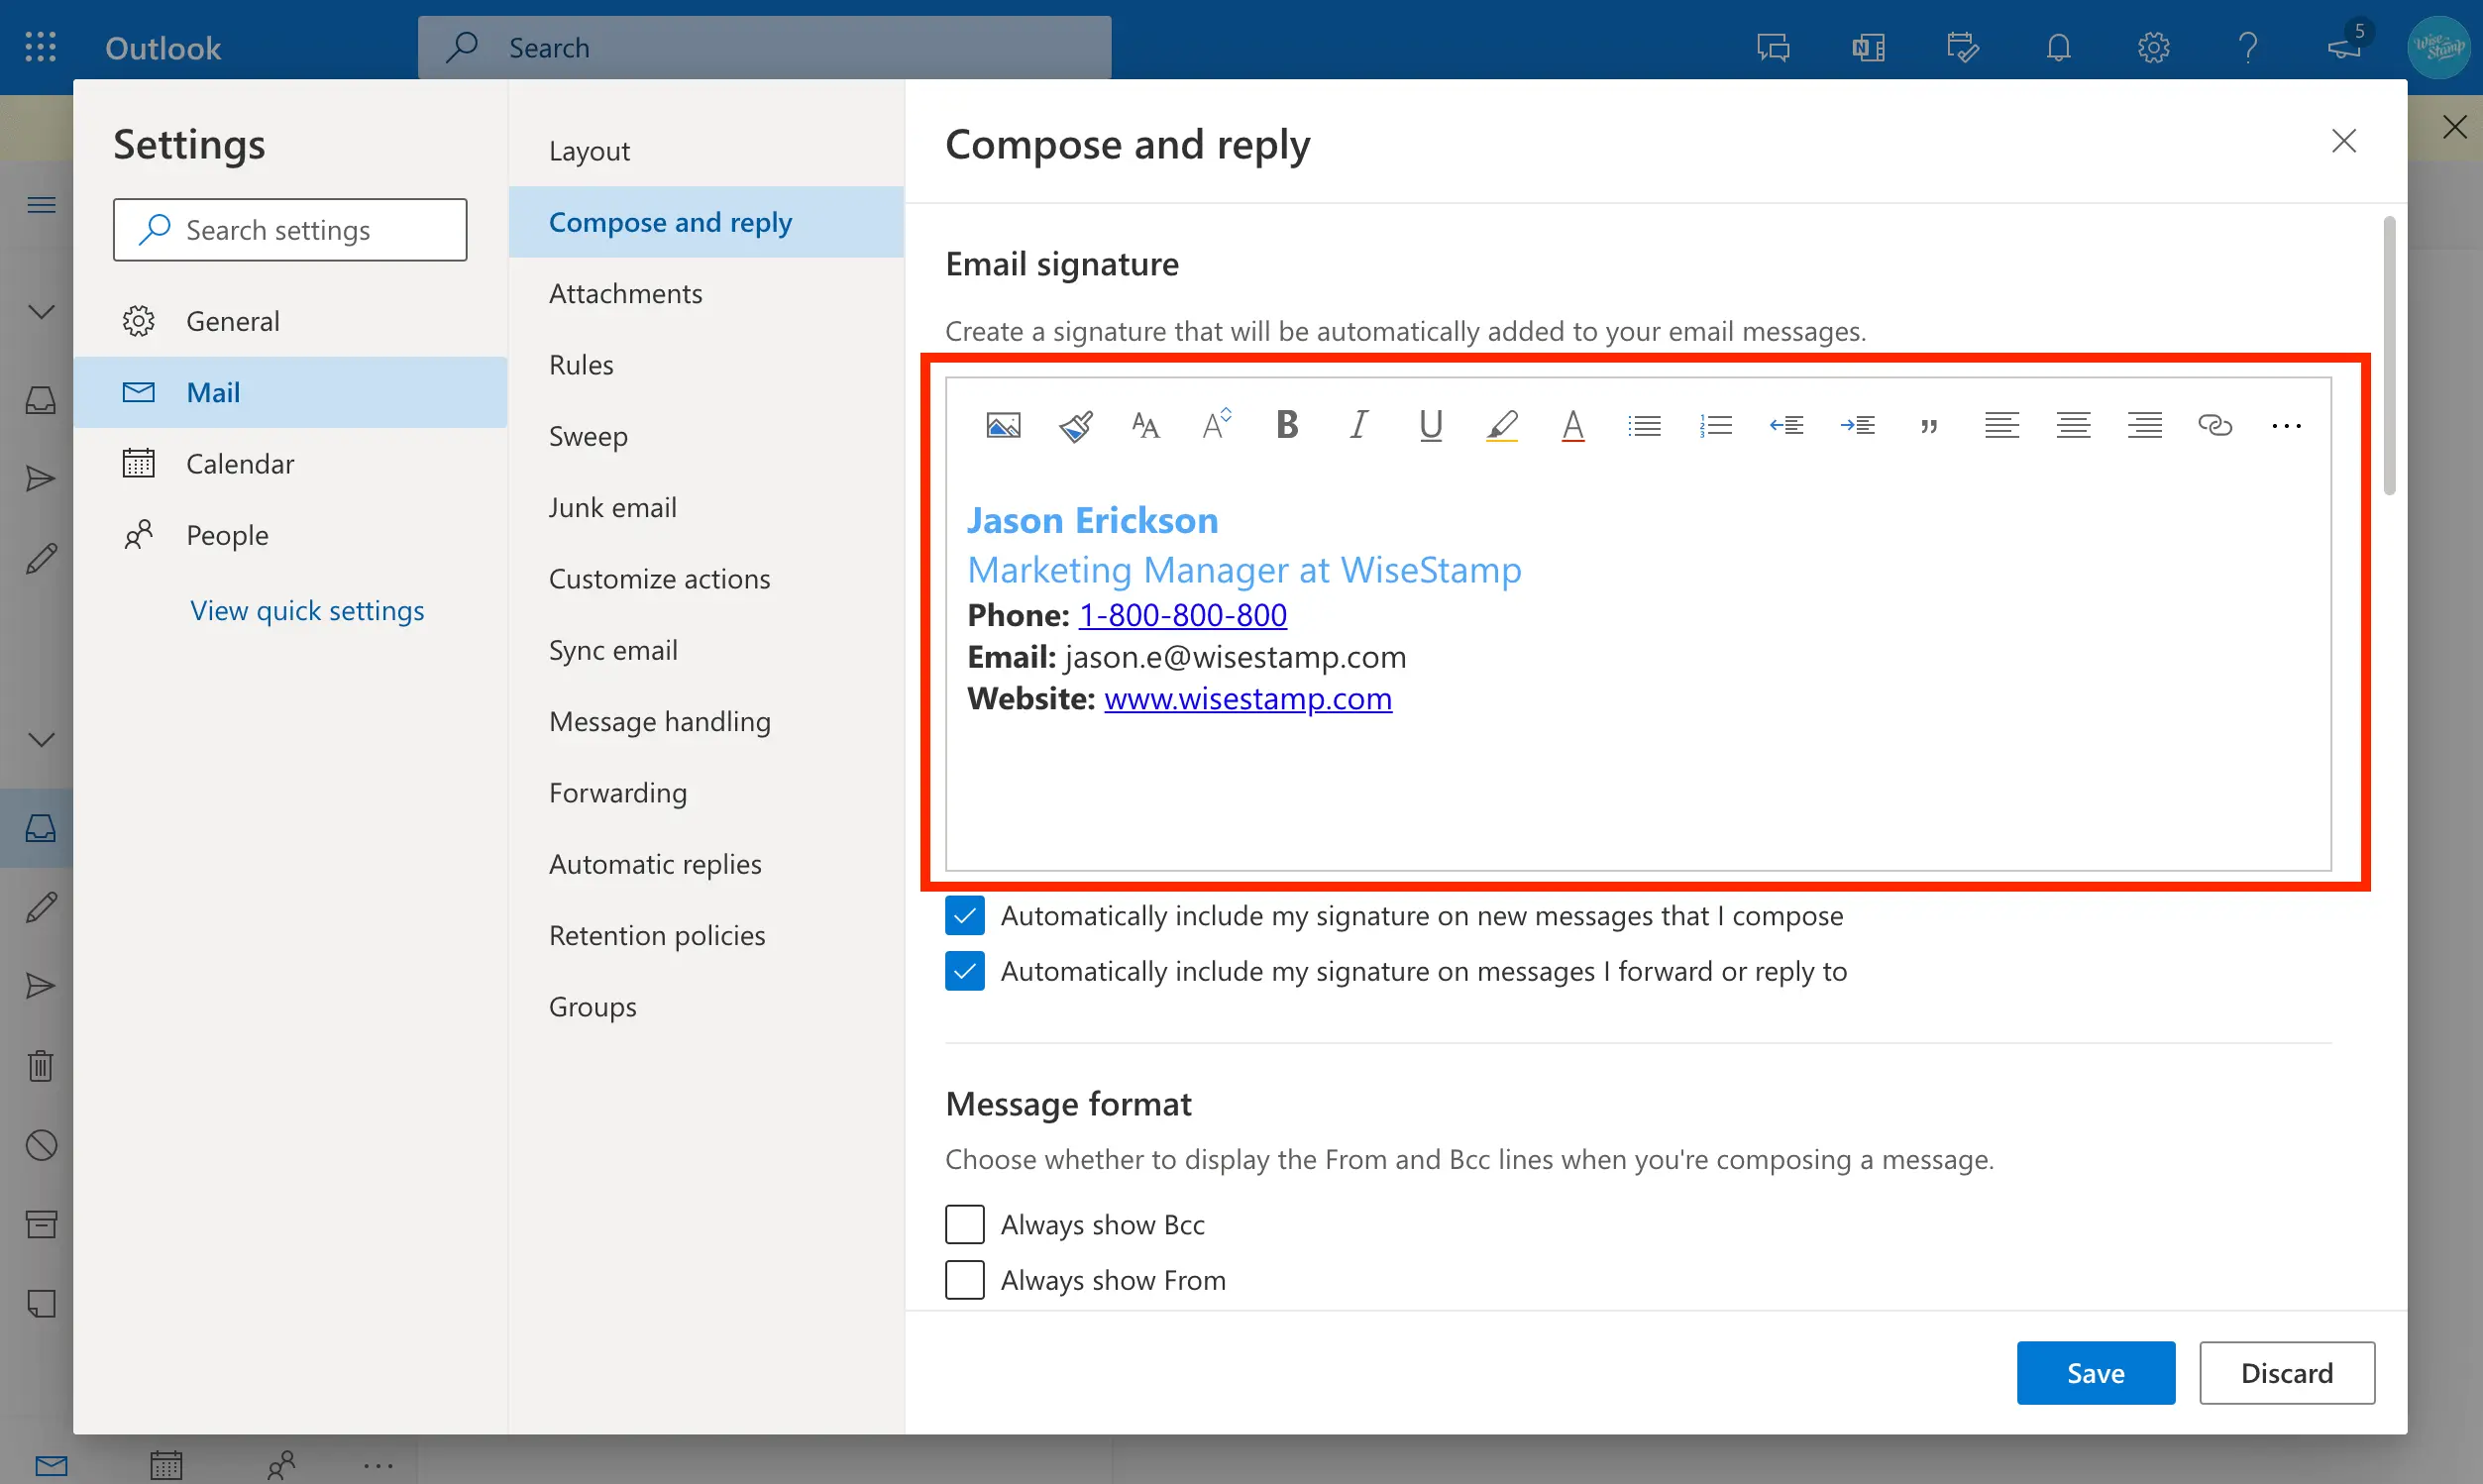
Design your new signature
Use the toolbar in the text box to create and design your email signature.
Save and set as default
When you’re done creating your signature, select whether to include the new signature for all new messages, replies/forwards, or both. Lastly, click “Save.”
Add a signature in Outlook Mobile App
Adding a signature to the Outlook mobile app (Android or IOS) is a great solution for those who work on the run.
Here’s how to set up a signature in Outlook mobile app in a few simple steps.
Download and start up your Outlook mobile app
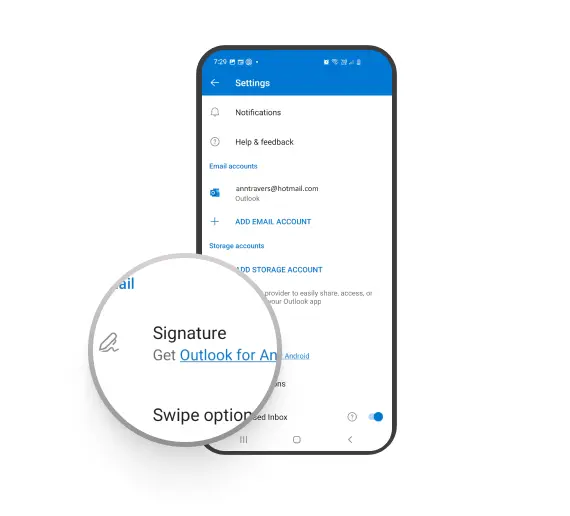
Navigate to "Settings," then "Email signature"
Click the hamburger icon at the top-left corner of the screen. Scroll down and tap on the settings icon followed by “Email Signature.”

If you have already added a signature on Outlook on the web, Outlook will automatically sync it to the app. See the screenshot above.
Create a new email signature on the Outlook mobile app
If you wish to add a new email signature on the app, tap “Use a different signature.”

Enter your desired signature text in the box that opens. You can include your name, title, contact information, or other relevant details.
Save your new Outlook email signature
Click the “✓” icon at the top-right corner, and you’re all set.
Note: The Outlook mobile app is now synced to other platforms, including Outlook on the web, Outlook desktop, and Outlook.com. Any changes you make on one platform automatically reflect across the others.
Outlook email signature not displaying
This mostly happens when you have set your default email signature to “No signature.”
Possible fix: Navigate to Settings > Account > Signature. Scroll to the bottom of the page and make sure you have selected the correct signature for new messages and replies/forwards. Click “Save” to apply the change.
See our full post on other possible fixes when the Outlook signature is not showing.
Signature is not displaying correctly
You’ve learnt how to create email signatures in Outlook, but when you send a message with the signature included, it’s not displayed correctly. In most cases, this is an HTML problem. It’s usually a result of using Microsoft Word to create your signature.
Possible fix: Use Outlook’s built-in editor to create your email signature. Also, stick to standard fonts like Calibri and Arial and avoid excessive formatting.
Images not showing in Outlook signature
You’ve created a professional Outlook signature with a logo and your headshot, but images either don’t load or appear as broken links. Sounds familiar? This issue has several causes, including large image files, incorrect file paths, and HTML code problems.
Possible fixes:
i) Keep your images under 100 kb.
ii) Check to ensure you’re not using a local path (like C:\Users\Name\Pictures\logo.png), otherwise the images won’t show up for recipients. Instead, ensure your images are hosted online or embedded correctly using the “Insert image inline” option.
iii) If you coded the signature yourself, check the code to ensure there are no missing tags or broken references.
Generate HTML signature for Outlook
You may want to learn how to create an email signature in Outlook using HTML if you want greater customization.
Unlike plain text, HTML lets you add company logos, social media icons, colors, and clickable links.
The result is a more engaging and visually appealing email signature that aligns with your company’s branding needs.
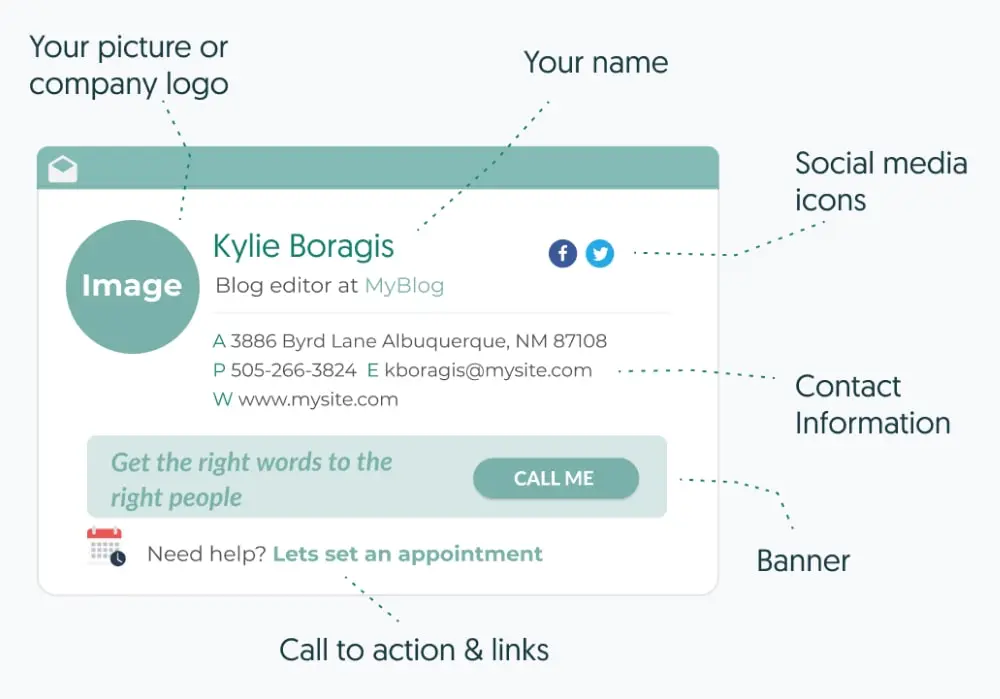
A basic Outlook HTML signature would have these elements (but there are lots more):
How to create an Outlook signature with WiseStamp
We don’t want to brag, but WiseStamp is the rockstar when it comes to the best email signature generators. We have just the right templates and integrations to make the right impression in those professional inboxes.
Follow these steps to learn how to make a signature on Outlook with WiseStamp in minutes!
Create your WiseStamp account
Go to Wisestamp, create a free account, or log in if you already have one. Once logged in, click “For Individuals” or “Create your own signature.”
Create and customize your signature
On the editor page that opens, fill in your personal information like name, title, company, phone number, and website. You should see your details populate the template on the right-hand side. Use the tabs on the left-hand side to add your images (headshot and logo) and social media icons. Click on “Template” to choose the ideal template for your Outlook email signature. Go to the "Apps" tab to enhance your signature further. You can add a YouTube video, a quote, a styled sign-off, a call-to-action button, and more.
Save your email signature
If you're happy with the design, click "Ok, I'm done" to save your email signature.
How to set up an email signature on Outlook
On the floating window that pops up when you click "Ok, I'm done," click "Install for Outlook" to copy your signature to the clipboard. Open Outlook for Web or desktop and navigate to the email signature section. Paste your new signature and click “save”.
Remember to set your new email signature format as your default signature if you want to apply it automatically.
10 upgrades to your Outlook signature
There are two options for how to edit signatures in Outlook using HTML. You can code it manually or use a generator like WiseStamp. Whichever route you choose, here are essential features you can add using HTML, depending on your signature type:
- Youtube video thumbnail
- Quote of the day
- Custom button
- Banner
- Instagram Gallery
- Scheduler
- Email disclaimer
- Green footer
- Signature sign off
- Online payment button