
Short answer
Unsend or recall emails in Gmail
Each time you send an email, Gmail will prompt you with the option to “Undo send”. The prompt shows up at the bottom-left-hand side of your Gmail window immediately after you click “Send”. You have 5? seconds to click on the button before it disappears. Do so and the email will be recalled. You cannot delete an email you already sent from the recipient’s inbox.
Did you make a critical mistake when sending an email, and you wish you could recall it back before it hits your recipient’s inbox?
The good news is that you can recall Gmail emails within up to 30 seconds after sending them. If you are fast enough, you can click on the “Undo send” popup, fix your email, double-check it and send again.
But I realize that you may be here because you’ve sent a bad email and missed your window of opportunity to unsend., This is where it becomes more problematic. Gmail does not allow you to unsend after 1 minute, so forget about unsending after 1 hour or 1 day.
If this is your case, then it’s too late, there’s no recalling your email now. But you can damn well make sure this never happens again. This article will teach you how to never again send out an email that could cause you embarrassment.

Why can’t I delete an email I already sent in Gmail?
Current email protocols do not allow you to delete sent mail from the receiver’s inbox. At least not in Gmail. The only time you can actually delete a received email is when that email was sent within the same email network, such as a company’s Microsoft exchange in-organization email system.
The “Undo send” feature in Gmail in actuality is not recalling your email after it has been sent. What it does is apply a delay mechanism that holds your email for a certain period of time before it is actually sent. But once your email client sends it out, it’s out of their control.
The reason you can’t delete an email from another person’s inbox after it’s been sent has to do with the way email protocols work. Email protocols govern how emails are sent and received between email accounts (You can read more about email protocols here).
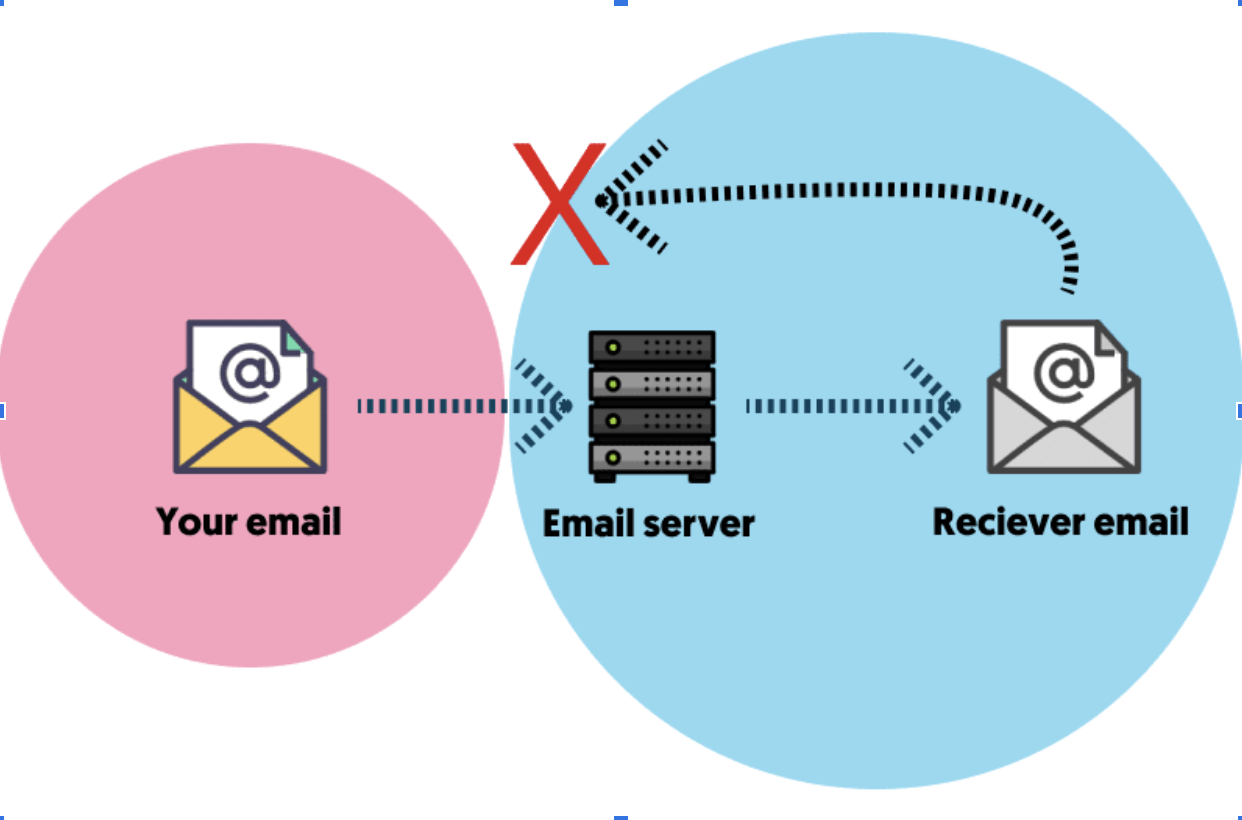
When you send an email, your email client (Gmail, Outlook, Mac Mail, etc.) will send that email to the recipient’s email client. First, it will be accepted by their email server and then distributed to the recipient’s email on all her devices.
The important thing to point out is that once your email is received by the email server, it can not be recalled because the protocol does not permit this type of communication. You either send or receive emails, you cannot recall.
Increase the length of your “Undo send” time window
By default, Gmail allows you to use the Undo send feature within 5 seconds. However, you can increase this time window to give yourself more time to recall your emails.
The maximum time you can recall sending an email in Gmail is 30 seconds.
The time delay options for undo send are:
- 5 seconds
- 10 seconds
- 20 seconds
- 30 seconds
How to edit the time delay for Undo send:
Preferably use Chrome which has a better user experience for your Gmail account. However, any other browser such as Firefox and Microsoft Edge will still work fine.
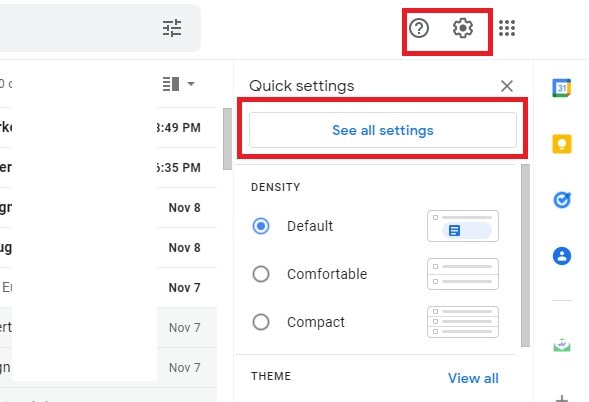
1. “Click” on the “Settings” gear in “Gmail“, select “See all settings“
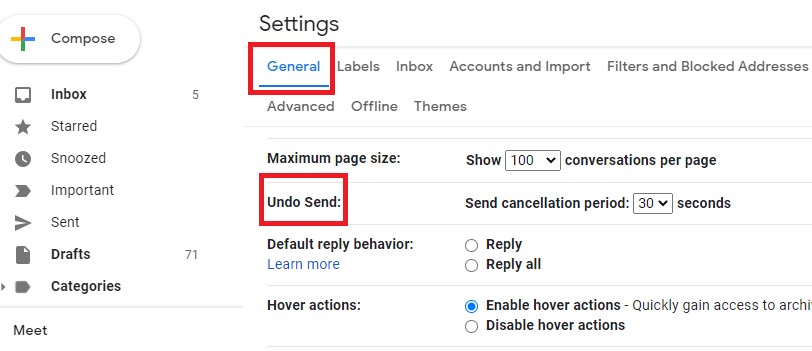
2. Scroll to the “Undo send section” (find it quickly by hitting ctrl+F and search for “undo”) in the “General tab in Gmail“
3. Set your preferred “Send cancellation period” by clicking on the drop-down arrow (you may select either 5, 10, 20, or 30 seconds)
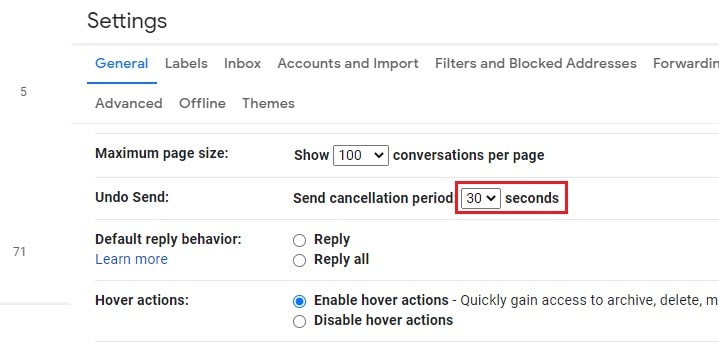
4. Hit “Save changes”
Apply email workflows that help you avoid mistakes
It is in human nature to make errors. With email writing tools, you can reduce the chances of sending emails by mistake. So knowing you cannot recall emails in Gmail, the least you can do is minimize your likelihood of sending an email you later regret.
You can incorporate some email workflows to ensure you minimize the chances of sending emails by mistake.
- Double-check email
As much as auto-complete saves you a lot of time and effort, you need to be careful how you use it. When sending an email to John, you need to clarify that you have sent it to the right John. Your email can help resolve most issues associated with auto-complete functionality.
- Schedule emails in advance so you don’t have to rush
Scheduling emails hours or days in advance should help, instead of rushing, you can set up a time and date to send. This can help you compose the email without stressing, you can take your time to think clearly and identify all mistakes.
- Avoid send to all
Send to all reduces the headache of typing one email address at a time. However, do not get into the tendency of using it unless necessary. If you send out an email to a large group of people with loads of mistakes, you will not be able to recall it.
Email writing tools
- Polymail – This Mac extension helps you get a detailed profile for each email. You can use it for email scheduling – both outgoing and incoming emails.
- If No Reply – The tool helps you schedule follow-up emails if the people you messaged do not reply.
- Hemingway – Hemingway is designed to help you fix writing errors in your email, including adverbs, passive voice sentences, and complicated phrases.
- Boomerang Respondable – The tool evaluates your email as you compose it to determine a wide range of factors such as subject length, word count, politeness, subjectivity, and reading level.
- Crystal – This email writing tool helps you communicate professionally by gauging the email’s tone for boldness and confidence.
Write an email apologizing for sending a message by mistake?
When you send the wrong email and unfortunately cannot recall it, it is not a good practice to just leave everyone in suspense. The right thing to do, which could safeguard your reputation, is to send an apology email for the mistake. That can get the recipients to acknowledge that everyone makes mistakes and appreciate the extra effort you put in apologizing.
As you write the apology email, there are 3 things you want to make sure that you fulfill them:
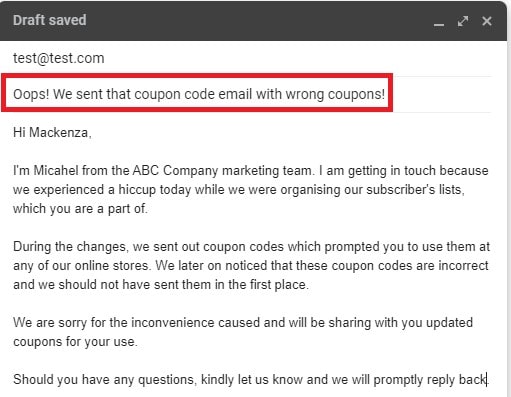
- Indicate the apology in the subject
The user will first see the subject line. Thus, you need to make sure that your apology starts from there to immediately clarify the purpose and increase the chances of the user reading your email. Admitting the fault can prove effective.
Apology in the subject line examples
- About our last email…
- Let’s try this again…
- Sorry about that!
- We messed up.
- Oops! Here’s the email we meant to send.
- Make a personal introduction
Personalizing the apology emails gives it a higher chance of positive reception. The user should be able to recognize your email address. You can give the email a more personal touch by making sure it shows your name and responsibility at the company.
- Apologize immediately
Do not wait until the end of the email for you to apologize. You need to make sure that your apology is explicit and immediate. Additionally, the apology should be short and straightforward. Let the apology be the first email element to help the user get your point without scrolling down.
Heading: We messed up
Greeting: In our last newsletter, we introduced Colombian coffee.
Body: Then, we showed a few more coffees, using a header” As long as we’re in Central America. This was a flippant oversight. Colombia is in South America, not Central America as the other coffees listed are. To those who reached out to correct this, thank you. To those who will see It and cringe, you’re right. We are sorry.
Sign off: Best, Coffee whole beans
Final thoughts
I think we have all had our moments where we have immediately regretted clicking the “send button”. But now you have all the tools in your tools box in order to recall Gmail emails to avoid sending an incorrect email.