How to Setup Automatic Email Signatures in Outlook
Learn how to set up automatic signatures in Outlook for web, desktop, Android, and iPhone. Save time and ensure a professional impression
Short answer
Why automatic signatures in Outlook are a must?
Manually adding signatures to emails is time-consuming and often inconsistent. Important contact details can get left out, making communication harder. Automatic signatures in Outlook save time and ensure that your emails always have the necessary information.
How to set automatic Outlook signatures
On Outlook for desktop
Navigate to the Signatures menu

On the Message tab, look for the Include group. Here, you will see an option for Signature.
Click on it and then select Signatures from the dropdown menu.
Create a new signature
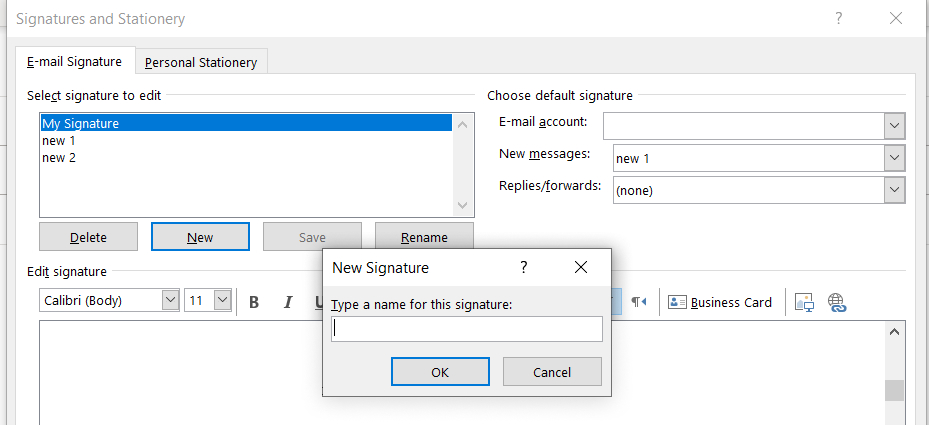
In the Signatures and Stationery window, go to the Select signature to edit section.
Click on New to create a new signature. A dialog box will appear asking for a name for your new signature.
Type in a name that you can easily remember, and click OK.
Set default signatures
Now, you need to set your default signatures. Under Choose default signature, you will find several options:
- E-mail account: Choose the email account you want to associate with this signature. You can create different signatures for each of your email accounts if you have more than one.
- New messages: Select the signature you want to be automatically added to all new email messages. If you prefer not to have a signature for new emails, you can select (none).
- Replies/forwards: Choose the signature you want to be added to all replies and forwarded emails. Again, if you prefer not to have a signature for replies or forwards, select (none).
Edit and customize your automated Outlook signature

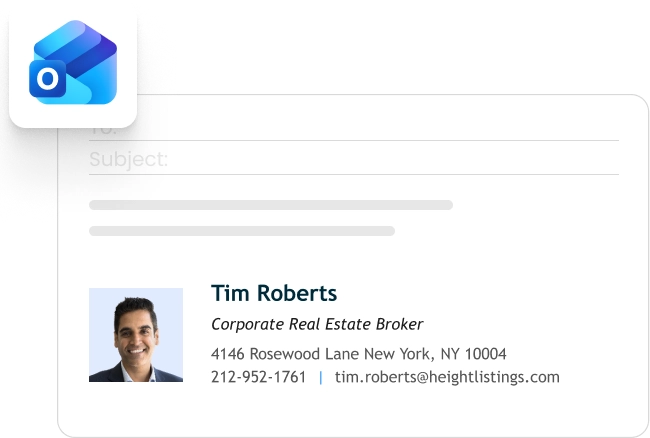
Under Edit signature, type out your signature. You can add your name, job title, phone number, and any other information you want to include. You can also format the text using the mini formatting toolbar above the text box. This allows you to change the font, size, and color of your text. Additionally, you can add social media icons and links to your signature.
Set your automatic Outlook signatures
To automatically add a signature in Outlook, go to the top-right corner of the Outlook editor.
There, you’ll find two dropdown menus: one for setting a signature for New messages and one for Forward/Reply messages.
Choose the signature you want for each message type and click “OK” to save.
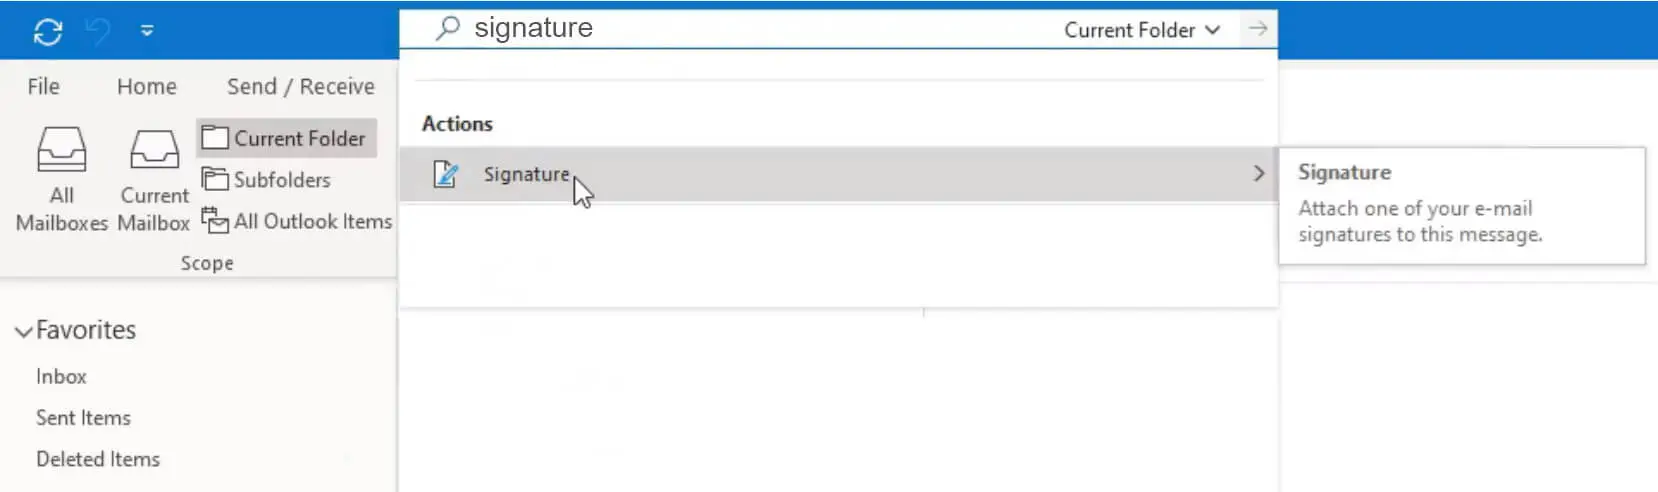
To manage your signatures directly from the Message window, click on the “Signature” button in the top ribbon.
From there, you can select the desired signature for any email. Once done, click save, and you are good to go 🙂
How to add a signature to replies or forwarded messages in Outlook
When you create a new signature in Outlook, it automatically becomes the default for new messages.
However, to include this signature in replies or forwarded emails, you need to adjust your settings.
Here’s how to ensure your signature is added to all types of emails.
2 steps to add a signature to replies i.e “Outlook reply signature”
- Open a new email message in Outlook. Navigate to the Message tab and click on Signature in the Include group, then select Signatures from the dropdown menu.
- In the Signature and Stationery dialog box, go to the E-mail Signature tab. Here, you’ll see a section called Choose default signature. From the Replies/forwards drop-down list, select the signature you want to use, then click OK.
How to set up automatic signatures for Outlook web app?
11 – Launch Outlook Web:
- Open Outlook Web and sign in to your account.
2 – Access settings:
- Click on Settings, then select View All Outlook Settings.
3 – Compose and reply:
- Go to the Email settings, then click on Compose and Reply.
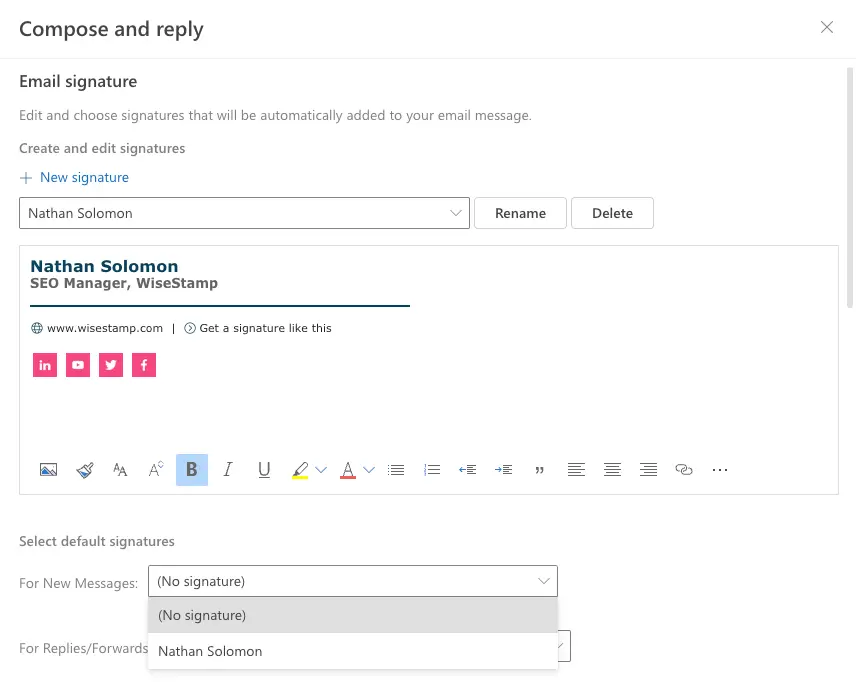
4 – Create your signature:
- Under Email signature, type your signature and choose the formatting options.
- Check the boxes to automatically include your signature on new messages and replies/forwards.
5 – Save your settings:
- Click Save to apply your signature.
See detailed guide on: How to add signature in Outlook | Generate company-wide signature
How to set up automated signatures on Android Outlook app?
1 – Launch the app:
- Open the Outlook app on your Android device.
2 – Access settings:
- Click on the Home menu, then select Settings.
3 – Create your signature:
- Click on Signature, turn on the Per Account Signature slider, and add a signature for each account.
See our detailed Outlook mobile signature guide | Generate signature
How to set automatic signatures on Mac and iOS?
For the Mac Outlook app
1 – Launch Outlook on Mac: Open Outlook and go to Preferences from the Outlook menu.
2 – Create your signature: Select Signatures under Email, then add your signature.
For the iOS Outlook app
1 – Launch Outlook on iOS: Open the Outlook app on your iOS device.
2 – Access settings: Click on your profile icon, go to Mail, then click on Signature to add your signature.
Automatic Outlook signature tips
If you use Microsoft Office 365 signatures and access your email through both Outlook and Outlook on the web, you will need to create your signature in both places.
This is because the signatures you create in one do not automatically sync with the other.
To create and use email signatures in Outlook Web App, follow the instructions in the guide on creating and adding an email signature in Outlook Web App.
Setting up automatic signatures in Outlook is easy and saves you time. Your emails will always have a professional touch with consistent contact information.
This is not just about convenience but also about making a good impression and ensuring reliable communication.