How to Add a Disclaimer in Outlook signature (Office 365 & Desktop)
How to add a disclaimer to your email signature in Outlook (desktop & web app). Add legal disclaimers to your Outlook signature in under 2 minutes.
Adding a disclaimer to your Outlook is fairly simple. It’s no more than adding another line of text to the bottom of your current signature.
You have 2 ways to do this: either manually add text using the integrated Outlook signature editor or use an HTML email signature generator to create your signature’s code and styling for you.
How to manually add a disclaimer in my Outlook signature?
To manually add a disclaimer to your Outlook, go to your Outlook editor and add the disclaimer at the bottom of your current signature in plain text.
If you still don’t have a signature, follow our guides for making a new Outlook signature and add the disclaimer line at the bottom. You can also get some disclaimer ideas here.
How to add a disclaimer using an HTML email signature generator?
The fastest and best way to add a disclaimer to any Outlook version (Office 365, OWA, and all desktop apps) is by using a generator. It will save you a lot of manual work and does not require any understanding of code or design in order to create a beautiful, professional signature.
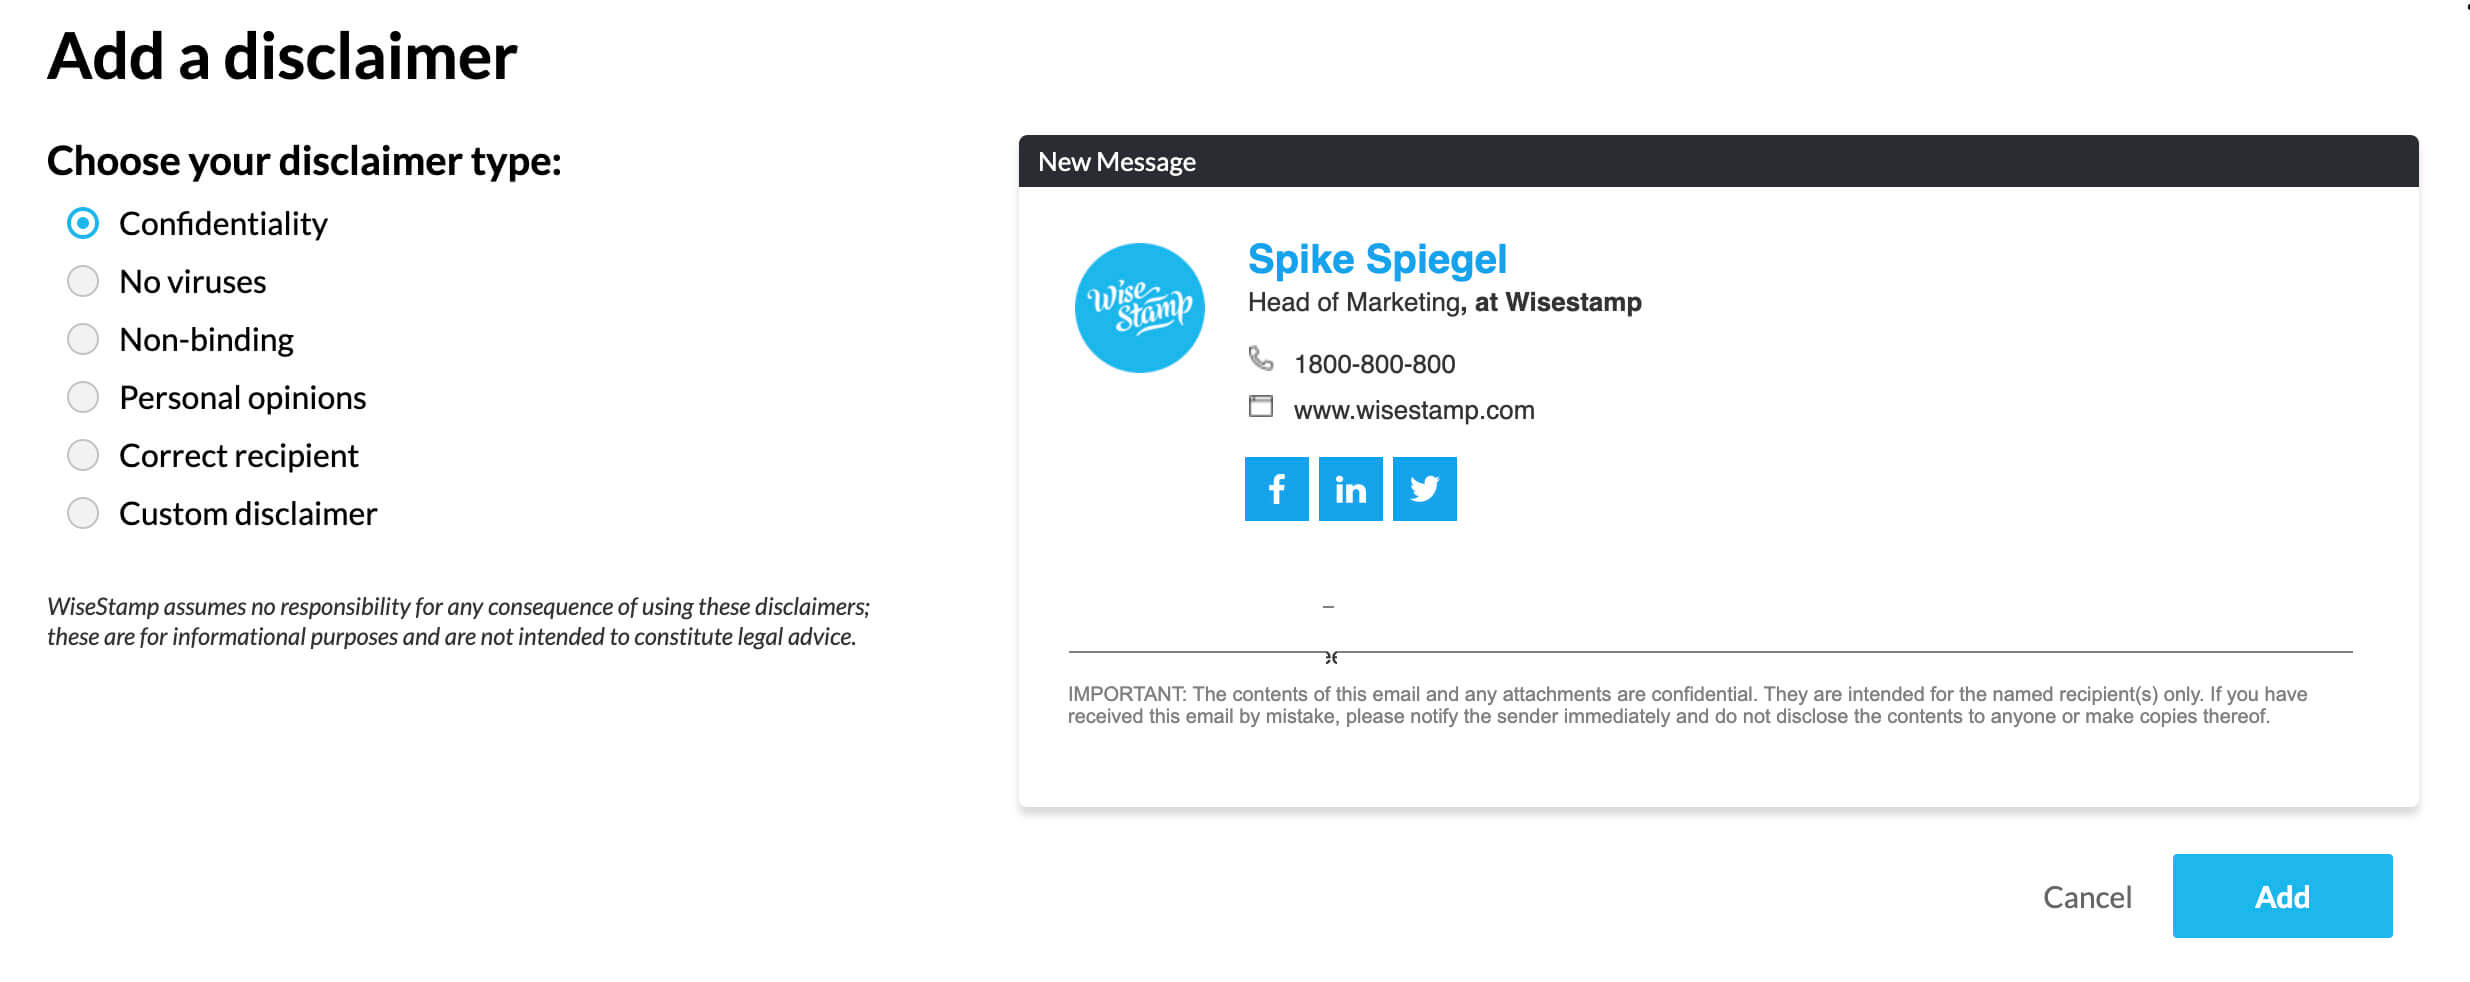
Instructions:
- Open the Wisestamp email signature disclaimer add-on and choose the type of disclaimer to require > click the blue “Add” button to add the disclaimer to your new signature
- Go to the Details tab and add your personal and professional information
- Upload a photo of you are your company logo and add social links (if needed)
- Click the green “OK, I’m done” button at the bottom right of the editor. We’ll install your new disclaimer signature in your Outlook